Monday, October 05, 2015

Installing Nvidia GTX 950 Drivers in Ubuntu 14.04.3 Linux

STEP 1.

Download the correct nvidia-driver for your Nvidia Graphic Card. You have to pick the right Graphic Card and Operating System (O.S.) (Mine was GTX 950 and LINUX 64-bit).

You can get the drivers at;
http://www.nvidia.com/Download/index.aspx?lang=en-us
If that link fails, just search web for “nvidia download linux".

Once the file is downloaded, you need to Right-click on the file you downloaded and make it Executable.


STEP 2.

Open a TERMINAL Window and type:
sudo apt-get update && sudo apt-get upgrade && sudo apt-get dist-upgrade && sudo apt-get install build-essential && sudo apt-get install linux-source && sudo apt-get install linux-headers-generic
 (Hit Enter)


  • That is all one line (cut and paste it all at once)


STEP 3.

It takes some time for STEP 2 to run. When it finishes, type;
   sudo gedit /etc/default/grub 
   (Hit Enter)


  • This opens the file grub in GEDIT as root.  Use gedit to change the line that has;

GRUB_CMDLINE_LINUX_DEFAULT="quiet splash nomodeset"

  • Replace it with; 

GRUB_CMDLINE_LINUX_DEFAULT="nouveau.blacklist=1 quiet splash nomodeset"

  • This forces putty to use low-level graphics mode to get rid of the Blank Black Screen.


Once you've made the change to the grub file, you just save it in GEDIT
FILE-->SAVE

  • remember where you save this file too.

After saving the grub file, with the changes, close GEDIT.

Now back in the TERMINAL Window type;
   sudo update-grub2
   (Hit Enter)


STEP 4.

Type;
   sudo apt-get remove nvidia* && sudo apt-get autoremove
   (Hit Enter)

  • This uninstalls any previous version of the Nvidia drivers
Type;
   sudo reboot 
  (Hit Enter)

  • This resets (reboots) your computer


Step 5.

Once the computer reboots open a TERMINAL Window and type;
    sudo gedit /etc/modprobe.d/blacklist.conf
   (Hit Enter)

add these lines to the end:
blacklist vga16fb
blacklist nouveau
blacklist rivafb
blacklist nvidiafb
blacklist rivatv
blacklist lbm-nouveua
options nouveau modeset=0
alias nouveau off
alias lbm-nouveau off


Once you've made the change to the blacklist.conf file, you just save it in GEDIT
    FILE-->SAVE
After saving the blacklist.conf file with the changes, close GEDIT.


STEP 6.

Open a PUTTY-TERMINAL by pressing Ctrl + Alt + F1
Once TERMINAL opens type;
    sudo service lightdm stop 
    (Hit Enter)

  • This stops graphic the session so we can now install the new drivers.

type;
    cd Downloads
    (Hit Enter)

  • This assumes you downloaded your nvidia-file to the DOWNLOADS directory.  Adjust as needed

type;
     sudo ./NVIDIA-Linux-x86_64-355.11.run
    (Hit Enter)

  • Your NVIDIA-Linux-x86_64-355.11.run file may have a different name, just substitute it for mine
  • Follow the onscreen installation instructions (normally YES to all questions)


SPECIAL STEP (Skip this step usually)

  • Type: sudo nvidia-xconfig (Hit Enter) only if you did not chose “yes” to this in the installation 


STEP 7.

Still in the TERMINAL type;
   sudo reboot
   (Hit Enter)

Once your machine restarts, type;
   sudo gedit /etc/default/grub 
   (Hit Enter)

This opens the file grub in GEDIT as root.  Use gedit to change the line that has;
GRUB_CMDLINE_LINUX_DEFAULT="nouveau.blacklist=1 quiet splash nomodeset"
Replace it with;
GRUB_CMDLINE_LINUX_DEFAULT="quiet splash nomodeset"

  • This puts back what we did in STEP 3.

Once you've made the change to the grub file, you just save it in GEDIT
     FILE-->SAVE
After saving the grub file with the changes, close GEDIT.


STEP 8.

Back in TERMINAL type;
   sudo update-grub2 
   (Hit Enter)

Last one type;
   sudo reboot
   (Hit Enter)


You are DONE!!!!  
If all went well you now have Priority Nvidia Drivers installed and working.  The bad news is that every time your Linux Kernel gets updated you have to reinstall your Nvidia Drivers.  To do this reinstall, I just completed the instruction in STEP 6 only.  This worked for me.   I guess you could try doing STEP 4 first then STEP 6. if STEP 6 only didn't work.  I hope this helps and it should work for Nvidia GTX 750ti, 950, 960, 970, 980, Titan X.

On my system when my Kernel Updates I get stuck at the logon screen.  To reinstall your Nvidia Drivers you have to open a PUTTY-TERMINAL by pressing Ctrl + Alt + F1. This will open a TERMINAL Window to get you started.

UPDATE*** On the first Kernel Update I had to reinstall the Nvidia Driver but the second kernel update I did not.

If this method is not working for you or you don't want to try the "Manual" method, try this link to an article on WEB UPD8 which uses a PPA.

Sunday, October 04, 2015

Built a New Linux (Ubuntu 14.04) Box

I wanted to build a new Linux compatible box but couldn't find much information about which parts would work and which wouldn't.  After a lot of research and some plain ass guessing, I pulled the trigger and ordered some parts.  Everything on this list works just fine on Ubuntu 14.04.03 and on 15.04.  All these parts can be purchased at NewEgg.Com or Amazon.Com.

  • NZXT Phantom 410 Series CA-PH410-W1 Black/White Steel / Plastic ATX Mid Tower Computer Case . (NewEgg.com Part Number 11-146-087) $99.99


  • ASUS Z97-A/USB 3.1 LGA 1150 Intel Z97 HDMI SATA 6Gb/s USB 3.1 ATX Intel Motherboard.  (NewEgg.com Part Number 13-132-510) $139.99   ***


  • CORSAIR CX series CX500M 500W ATX12V v2.3 SLI Ready CrossFire Ready 80 PLUS BRONZE Certified Modular Active PFC CP-9020059-NA Power Supply. (NewEgg.com Part Number17-139-050) $54.99


  • Intel Core i5-4590 Haswell Quad-Core 3.3GHz LGA 1150 84W BX80646I54590 Desktop Processor Intel HD Graphics 4600. (NewEgg.com Part Number 19-116-991) $189.99


  • SAMSUNG 850 EVO MZ-75E500B/AM 2.5" 500GB SATA III 3-D Vertical Internal Solid State Drive (SSD).  (NewEgg.com Part Number 20-147-373) $183.99


  • G.SKILL Ares Series 16GB (2 x 8GB) 240-Pin DDR3 SDRAM DDR3 1866 (PC3 14900) Desktop Memory Model F3-1866C10D-16GAB. (NewEgg.com Part Number 20-231-560) $75.99


  • LITE-ON DVD Burner 24X DVD+R 8X DVD+RW 8X DVD+R DL 24X DVD-R 6X DVD-RW 16X DVD-ROM 48X CD-R 24X CD-RW 48X CD-ROM SATA Model iHAS124-14. (NewEgg.com Part Number 27-106-393) $9.99


If you do not need additional Hard Drive storage or don't want better Video performance, you can stop buying here as the motherboard above has on-board intel 4600 video.  However I wanted more storage room and faster video so I placed a 2nd order at amazon.com.  But I have to tell you that the next three items require you to do some Terminal Commands and install a couple of helper apps to get them working (Hard Drives bigger than 2TB require special attention if you want them to be one big drive and the GTX 950 is new and needs to have its drivers installed from the Terminal Command Line).


  • Seagate 5TB Enterprise Capacity HDD SATA 6Gb/s 128MB Cache 3.5-Inch Internal Bare Drive (amazon.com Part Number ST5000NM0024) $169

  • WD Red 2TB NAS Hard Drive: 1 to 8-bay RAID Hard Drive: 3.5-inch SATA 6 Gb/s, IntelliPower, 64MB Cache (amazon.com Part Number WD20EFRX) $89


  • EVGA GeForce GTX 950 SSC Graphics Card (amazon.com Part Number 02G-P4-2957-KR) $169

You may be asking "why did you get a 2TB hard drive and a 5TB hard drive"?  Well I was not sure if I could get the 5TB drive to work with Linux so the 2TB was a "just in case" buy.  I thought of just sending it back and getting another 5TB but I still have 2 open hard drive ports on the motherboard so I kept it (plus I was just too lazy to return it).

In the next couple of Posts, I'll tell you how to get your Geforce GTX 950 running at full speed and how to partition and format your larger than 2TB hard drives to work as a single large unit.

NOTES:

*** Everything is working in UBUNTU 14.04.3 on the ASUS Z97-A/USB 3.1 LGA 1150 Intel Z97 motherboard but I'm not sure on USB 3.1 at full 10GB speed.  The ports are working and are running at least at USB 3.0 (5GB) speed.  I don't have any USB devices that run at the full 3.1 speed. The only change to the BIOS I made was a check block that asked what O.S. I was going to use, I checked OTHER (Microsoft Windows was the other option).  There is an "AutoTune" button that I hit once everything was installed and it kick my RAM up to full speed and did a small overclock to my CPU (I undid the CPU overclock as I will be leaving this computer on 24/7). ASUS makes about 4 motherboards in this line, I assume they would all work with Linux (one had Wifi built-in if needed)

*** The case is really nice with a great paint job but is kinda big for a "mid" and the top is not flat.  However wire management, fan placement and inclusion, water cooling options, toolless drive bays, and a 3 speed fan controller make up for the large size.  (4.5 stars out of 5)


*** The 16GB of memory is a faster speed (1866) than required (1600 is standard) but it was on sale at the same price so what the hell.


*** The CPU is LOCKED.  For $30 more you can get a K model that allows big overclocking which this motherboard makes very easy to do.  This CPU was on sale for $189.


*** DVD vs. Blueray.  I debated this when I setup this system but the DVD burner was on sale $9 and the Blueray Burner was $50 and I think Blueray is dying.


*** SSD vs. Standard hard drive.  I made the SSD my Boot Drive, installed all my Apps on it and put my HOME files on it.  Once I notice that I'm not accessing files in my HOME drive much, I'll move those files to either the 2TB drive or archive them on the 5TB drive (music and docs on the 2TB and old photos on the 5TB).  I bought a second SSD hard drive for a 3 year old laptop and it made the laptop scream!  If you have a laptop and it has a standard mechanical hard drive you have to BUY An SSD for it.  It's like getting a new laptop for $150 bucks!!!  


*** Power supply.  You get what you pay for.  If you are going to run a single graphics card with a couple of hard drives and fans (like I am) then 500 Watts work.  More graphic cards and peripherals means more power, suck it up, spend the money and get a good P.S.


*** Graphic card.  The motherboard supports the built-in graphic of the intel CPU so you do NOT need to spend money on a graphic card BUT...If you want to do any gaming (Steam) or Dual Boot Windows then get a graphics card.  I wanted an Nvidia card and there are many choices.  Get at least a GTX 750ti ($120) or better yet the new GTX 950 ($160) it uses the latest Nvidia parts.  If you really want to kick up your graphics GTX 960 ($200), GTX 970 ($310), GTX 980 ($500) or if you don't care about money GTX Titan ($1000).  The higher the "GTX Number" the faster, more memory, better the card is.  But the sweet spot looks to be the GTX 960 or 970.  Because the GTX 9xx series is newer you have to install their drivers from the Terminal and every time the linux kernel updates you have to reinstall the drivers.  I'll post the howto on that next.  I tried to get the RESTRICTED DRIVERS built-in option to work but it didn't recognize that I had an Nvidia Card installed.


*** Last Note.  When shopping at NewEgg.Com always, always, always google for special codes to get big savings.  NewEgg has hourly, daily, weekly, holiday and other "flash" deals.  I saved about $50 and got free shipping from deals I found but lost a 10% off my SDD because it was a "Flash" deal with limited quantities.  


Thursday, April 02, 2015

Startup Disk Creator doesn't make DVDs

Just a quick note;  Startup Disk Creator will only make bootable USB Drives NOT Bootable DVD's.  To make a bootable DVD use a Disc Burning program like BRASERO using the BURN IMAGE option and selecting your ISO image.

I trashed a Windows 7 install trying to make a dual boot laptop.  I should have read the instructions first.  Well now it's just a Linux Laptop :-)

Ubuntu 14.04.2

Monday, October 13, 2014

XnViewMP for Linux (Graphic Viewer)

I was updating some of the MS Windows software I use when I saw that XnViewMP released a Linux version.  XnViewMP is a graphic image viewer that has some cropping/tweaking abilities.  I use it on Windows so I thought I'd try it on Ubuntu.


The thing I like with XnViewMP is that it displays EXIF Data, allows you to add comments, set categories, and ratings, all searchable.  You can look at the 100's of photos you just took, rate them (poor, fair, average, good, excellent) then filter your displayed results to just show the "excellent" ones.  Or you can assign categories to your photos, and then filter based on those (i.e. pets, trees, me, etc.).


You can click on thumbnails and bring them up full screen.  From there you can launch a slideshow, do some color adjustment or apply a few filters.  You can resize images or print them.  There are some color adjustments, light level correction, and batch file operations (resizing, renaming, etc.)


To download and install XnViewMP Click Here and download the Linux Version (.deb).  Once it's downloaded just double click on the XnViewMP-linux.deb file and choose install once the Ubuntu Software Center appears.

The above link takes you directly to the download page.  If that doesn't work or if you just want to know more before you install it here's the main page link.

Wednesday, July 30, 2014

Auto Mount SMB Share at Boot

I have an Asus RT-N66U Router and it has two USB ports, one of which I have a 1 TB Western Digital Hard Drive attached.  To access it from my Ubuntu 14.04 box I have to use the BROWSE NETWORK option in Nautilus.  This usually works just fine but I started using a Backup Program called BACK IN TIME which does scheduled backups and it needs the remote server share attached all the time.  What we need to do is make a SMB Network Share (MS Windows Share) Auto Mount on Boot.

It's a little harder to do than just installing a few programs but it's not too bad.  Here's how we do it: (Read the NOTES section before starting)

1.  Open a Terminal Window

2.  Install CIFS (this may already be installed, Mine was)
         sudo apt-get install cifs-utils

3.  Create the mount directory.
          sudo mkdir /media/NautilusName

4.  Open your /etc/fstab file with gedit so you can edit it.
          sudo gedit /etc/fstab

5.  Once gedit opens your fstab file add the following 2 line to the bottom of the file and then save it.
         # Mount Point for Network SMB Share
         //192.168.1.1/ServerShare  /media/NautilusName cifs  guest,uid=1000,iocharset=utf8  0  0

6.  After you add the entry to /etc/fstab type:
         sudo mount -a

This last command will (re)mount all entries listed in /etc/fstab.  Open Nautilus and if you see your NautilusName is listed under NETWORK.  If so your good to go just reboot your computer and your network share will automount.

NOTES

We are connecting to the remote SMB Share as a guest which indicates you don't need a password to access the share.  To learn how to mount password protected shares go here.

NautilusName can be replaced by any name you want and it is what will show up in Nautilus.

//192.168.1.1/ is the IP address of your server and should be changed.

ServerShare is the share name on your server, change it to match yours.


The lines you added to your FSTAB file explained:

uid=1000 makes the Linux user specified by the id the owner of the mounted share, allowing them to rename files.

iocharset=utf8 allows access to files with names in non-English languages. This doesn't work with devices or Windows machines that export their shares using ISO8895-15.
 
If there is any space in the server path, you need to replace it by \040, for example if your server path is  "//servername/My Documents" use this instead  //servername/My\040Documents


Here is an image of the lines I added to my FSTAB file.


Saturday, July 26, 2014

Garmin ForeRunner 210 on Ubuntu 14.04 Update

After doing all the steps in my last Garmin ForeRunner 210 post, my FR 210 started showing up as a storage device (usb thumb drive) in Nautilus.  This made it very easy to copy the .FIT files from the watch to my hard drive. (the .FIT files are the new format that the Garmin Forerunner 210 uses instead of .GPX).
Notice the GARMIN in the DEVICES section.


Drilling down into the GARMIN "drive".


One more Drill down into the ACTIVITIES directory and we find our .FIT files

Just cut or copy the .FIT files from the watch to your HOME directory.  Now the problem is that .FIT format does not work with RunnerKeeper.com, so we have to convert the .FIT files to .GPX files.  Here's where we get to use our old friend GPSBabel.

1.  Open a TERMINAL window

2.  Type the following and press ENTER
   gpsbabel -i garmin_fit -t -f YourFitFileName.fit -o gpx -F zzzz.gpx

        (Replace YourFitFileName with the real name of your .FIT File
         usually the name is DateTime.FIT i.e. 2014-07-26-16-34-24.fit)  

3.  This will create a file in your HOME directory called zzzz.gpx.

4.  Use your web browser and log onto RunKeeper.com.

5.  Add an Activity to your RunKeeper.com and choose UPLOAD a map, picking the zzzz.gpx from your HOME directory.

6.  Done!  No need to use the GARMIN web site or their convert commands.


NOTE:  I'm using GPSBabel 1.5.0-2 32bit which I downloaded from here.  I used the .DEB package NOT the Ubuntu package (newer version).  There is also a 64bit version link here too,


Thursday, July 24, 2014

Garmin Forerunner 210 and Ubuntu

My trusty Garmin Forerunner 305 died.  After shopping around, I decided to get a Garmin Forerunner 210 to replace it (I thought about getting the Forerunner 220 but I found the 210 for $90 cheaper $160 and I didn't need the extra features).  I figured the 210 would be close enough to my 305 that it would work with my GPSBabel/RunKeeper.Com setup.  Not the case :-(  After some googling I did figure out a work around (the work around gets the Forerunner 210 working with Garmin Connect on-line which has an export to GPX).  Here is what you will need to do to get started:


1. Create a Garmin Connect Account.  http://connect.garmin.com/
    Click on the SIGN IN link it the upper right corner
    DO NOT CLICK ON THE get started LINK

    After clicking on the SIGN IN link, click on the
    DON"T HAVE AN ACCOUNT "CREATE ONE" link

    Fill out the required information and close your web browser.

2. You must have the Firefox Web Browser installed on your Ubuntu.
     I think Firefox is the default Ubuntu web browser
     If you do not have it installed, go to the Ubuntu Software Center and install it.

3. Install the Synaptic Package Manager
    Go to the Ubuntu Software Center and search for "synaptic" and install it.

We need two things installed now, Linux Garmin Communicator Plugin and the Garmin Forerunner Tools.  The Plugin is NOT available in Synaptic Package Manager so we have to install it from the command line. (You can read about the Plugin here http://www.andreas-diesner.de/garminplugin/doku.php)

CLOSE ALL INSTANCES OF FIREFOX

To install the Linux Garmin Communicator Plugin open a Terminal window and type the following (hit ENTER after each command):

 sudo add-apt-repository ppa:andreas-diesner/garminplugin

 sudo apt-get update

 sudo apt-get install garminplugin

The above steps should install garminplugin in Firefox as a plugin (In firefox go to tools/plugins to see).  If you want to check to see if it was installed correctly, just open up your Synaptic Package Manager and search "garmin".  You should see garminplugin and garmin-forerunner-tools are installed (green box).  If not check each of them and hit the apply button.


You are now ready.  Connect your Garmin Forerunner 210 to its USB connector and plug it into your Linux Box.  Now open Firefox and go to  http://connect.garmin.com/ and log in to your newly created Garmin Connect Account.  Next click on the UPLOAD button in the upper left of your screen and you should see something like the below picture:

If you see this, then it worked!  Go out and put some activities on your new Garmin Forerunner 210 watch and upload them to your Garmin Connect Account.  After they are uploaded you can either leave them there and use Garmin Connect to track your activities or the EXPORT option on the Garmin Connect site to EXPORT to GPX.  Use the EXPORT to download your activity as GPX file and then re-upload the GPX file to your RunKeeper.com account.

This should work with the following Garmin GPS Devices; Dakota, Oregon, Edge 200, Edge 305, Edge 500, Edge 705, Edge 800, Edge Touring Plus, Forerunner 10, Forerunner 110, Forerunner 210, Forerunner 220, Forerunner 305, Forerunner 310XT, GPSmap 60CSx, eTrex / eTrex Legend HCx 10.

I've installed the latest GPSBabel too (version 1.5.1).  If I figure out a way to use it again, I'll post another how to. Good Luck and Go Run!


Sunday, July 13, 2014

A Nice Clipboard Manager - Diodon

While I'm researching online for projects (like this one) I find myself opening a GEDIT doc and copying and pasting multiple items to that doc so I can use them later (like the commands in #2 below).  Well I found a nice little Indicator App that lets you copy multiple items and saves them in a nice drop down so that you can use them later.  It's call Diodon Clipboard Manager.  It runs as an Indicator App (little paperclip in the below picture) so it's conveniently located and easy to use.

Let's get it installed and running, here's how;

1.  Open a Terminal Window

2.  Type the following commands, hitting ENTER key after each one.

     sudo add-apt-repository ppa:diodon-team/stable

     sudo apt-get update

     sudo apt-get install diodon diodon-plugins

     diodon

3.  You're done. (see the little paperclip near your date/time)


Now let's make it start every time we reboot or start our system.


1.  Go to your main LENS on your UNITY Bar
     and type in startup applications and hit ENTER
2.  Double Click on the Startup Applications Icon.

3.  This will launch the Startup Applications editor

4.  If Diodon is already there, just close Startup Applications
     because you don't need to do anything and are done.

5.  If it isn't there, click on the ADD button and a popup window will appear.

6.  In the Popup Window type the following;

     NAME: Diodon
     COMMAND: diodon
     COMMENT: Clipboard Manager

7.  Click the SAVE button in the popup window and you're done!

Saturday, June 21, 2014

DropBox Quit Working on Ubuntu 14.04

I noticed that Dropbox had quit working when I upgraded to Ubuntu 14.04.  I kept getting a Crash Report window when I rebooted.  When I checked the details of the Crash Report I saw it was Dropbox.

I then noticed that the Dropbox icon was missing from Menu Bar at the top of my desktop.  I tried several things including uninstalling and reinstalling but nothing worked.  After a little Google searching I found this:

1.  Start a Terminal Window

2.  Type the following into the Terminal Window and hit ENTER:
        sudo rm -rf /var/lib/dropbox/.dropbox-dist

3.  Type the following into the Terminal Window and hit ENTER:
        dropbox start -i

4.  If asked for your sudo password (mine did) type it in.

5.  Wait  a few seconds and you will see in the Terminal Window that it is downloading the Dropbox program and then unpacking it.

6.  After step 5 finishes your Dropbox should be working again and you should see it's icon is back in the Menu Bar.

DONE!


Saturday, June 14, 2014

What to do after a installation of Ubuntu 14.04 LTS (Trusty Tahr)

This is a one of the best collections of Ubuntu 14.04 (Trusty Tahr) "After Install" document I've seen.

Link to the GOOGLE DOC

There is too much there to describe, you'll just have to click on the link and see it for yourself.


Thursday, June 12, 2014

Google Chrome: error while loading shared libraries: libudev.so.0


After upgrading from Ubuntu 12.04 to Ubuntu 14.04 my Google Chrome Browser stopped working. It wouldn't start when I clicked on it in the Unity Launcher so I opened a Terminal Windows and tried to start it there by typing in google-chrome.  When I did this I got the following error;

/opt/google/chrome/chrome: error while loading shared libraries: libudev.so.0: cannot open shared object file: No such file or directory

What the hell do you do?  Reinstall Google Chrome right?  Wrong, that didn't work.  After some internet searching I found the following Terminal Commands that worked like a charm.  You only need to run one of these commands.  Which one depends on which 'bit' version of Ubuntu you have 64-bit or 32-bit (mine is 32-bit)

Open a Terminal Windows and type ONE of the below commands.

64-bit fix
   sudo ln -s /lib/x86_64-linux-gnu/libudev.so.1.3.5 /usr/lib/libudev.so.0

32-bit fix
   sudo ln -s /lib/i386-linux-gnu/libudev.so.1.3.5 /usr/lib/libudev.so.0

FIXED!!!!!!


Here's a link back to the site where I found this fix;
http://askubuntu.com/questions/369310/how-to-fix-missing-libudev-so-0-for-chrome-to-start-again


Upgrading from 12.04 to 14.04

I stayed with Ubuntu 12.04 LTS through all the upgrades until 14.04LTS came out.  Well I couldn't wait until July for the upgrade to just happen (LTS's are not upgraded until a point release on the new LTS) so I made it upgrade tonight.  It's done with a single Terminal Command (make sure you have 12.04 up to date before trying this;

1.   Open a Terminal Window and type the following;

 sudo update-manager -d

This will start the upgrade process.  It took about one hour to download all the updates, an hour and 20 minutes to do all the installs and 15 minutes for the clean up process.  (about two hours total).  Once done I had no problems getting into the system and thing looked good.  (I had to upgrade my nVidia Driver to 331.38 (SYSTEM SETTING--->SOFTWARE & UPDATES--->ADDTIONAL DRIVERS tab)


I've found two other things I need to fix, Photoshop CS2 the ALT is not functioning again but I know how to make it work (there is a post in this blog on howto make it right).  The second is more difficult, Chrome won't start.  When I figure it out I'll post another how to on it.


Monday, March 24, 2014

Fix Your STEAM Install (Connection Error)

I had to put a little effort into get Steam to work on my Ubuntu 12.04 Install (Video Drivers update crashed me) so when it stopped working I fought it to get it back up and running.  The error I kept getting was "Could not connect to Steam network.  This could be due to a problem with your internet connection, or with the Steam network.  Please visit www.steampowered.com for more info."

Well my Internet Connection wasn't the problem and I didn't see any outcry that Steam was down so it had to be something on my system.  I uninstalled and reinstalled from the Ubuntu Software Manager and even downloaded the Steam .deb file, all with no luck.

The answer was to use the Terminal Command Line to reset Steam.  Here's how;

1.  Start TERMINAL
2.  Type
      steam --reset  (HIT ENTER)
3. Wait for this command to run completely
    (it will download all the Steam System files again.)
4. Re-enter your UserName and Password and you're good to go.

This should not affect your Steam Game Library but I cannot guarantee it as I only had one game downloaded and installed when I crashed and I deleted it when I tried to "fix" Steam before I found the reset command.  USE AT YOUR OWN RISK!


Sunday, March 02, 2014

Master PDF Editor

Do you need to edit PDF Files?  If so, then read this article on WEB UPD8's site on how to install Master PDF Editor. MASTER PDF EDITOR is NOT Open Source but is free for personal use on Linux ($50 on Windows).  The WEB UPD8 site is worth browsing too.

Monday, February 03, 2014

Expanding your Virtual Hard Drive in VirtualBox


I was getting an error saying I was out of Hard Drive Room when I tried to install the LibreOffice onto my VirtualBox Windows 7 install on my Ubuntu 12.04 box.  So I had to expand the Virtual Hard Drive.  To change the size of a dynamically growing virtual drive in VirtualBox 4.3 running on Ubuntu 12.04, run the following two commands in a Terminal Window:

     VBoxManage list hdds


This will display a list of all your Virtual Drives in VirtualBox.  You will need to write down or copy the uuid of the Virtual Drive you want to increase in size.  You will have a Virtual Drive for every Virtual OS you have installed on VirtualBox.  They have names with them so they are easy to differentiate. 

The last command is:

     VBoxManage modifyhd <uuid> --resize <newsize in MB>

When I did mine, my command looked like this (note the double hyphens):

VBoxManage modifyhd d009bb80-64a4-4ac2-a405-3681dff3964e --resize 30000

This increased my Virtual Drive from 14gb to 30gb.

That's all the Terminal Commands we need so close your Terminal Window and start you VirtualBox Windows 7.  Once your Virtual Windows 7 starts we need to tell it that it has more hard drive room.  To achieve this do the following:

In Windows 7, Right Click on COMPUTER and select MANAGE.


Once the Computer Management screen appears, select Disk Management to view new unallocated space (10.74 GB in below picture)


To finish, Right Click on your (C:) Volume (13.57 GB NTFS in the above picture) and select "Extend Volume..." from the menu that pops up. Choose the Unallocated Space when asked (just choose the defaults when the Wizard asks).  This will make your Unallocated Volume go away and your (C:) Volume will now be bigger.  Done!

Sunday, December 15, 2013

Connect to FTP Servers with Nautilus

I wanted a quick way to access a few FTP servers without having to open up Filezille.  It turns out that using Nautilus as an FTP Client is very easy and convenient. Under the FILE menu option you will find the option “Connect to Server”.

The connection dialog window provides the options to connect to various types of connections; FTP (public), FTP (Login), SSH, Windows Share, WebDAV and WebDAV (Secure).  The one I wanted was FTP with Login/Password.

So here's what we do to make an FTP connect we can access in Nauitlus which will allow us to just cut, copy, paste files to and from the remote FTP server.

1.  Open Nautilus and Click on the FILE menu option.
2.  Select the CONNECT TO SERVER... option.
3.  That will open up a dialog box.
4.  Select FTP (with login) from the TYPE dropdown
5.  You should now see this dialog box.
6.  Fill out the required Information.
7.  Check the REMEMBER THIS PASSWORD box.
8.  Click on CONNECT and your done!

This is fine for a one time use, but if you don't want to have fill out the dialog every time, you need to make the connection a BOOKMARK.

While you are connected to the FTP server you should see your FTP server connection listed under NETWORK list on the left side (bottom) menu of Nautilus.  Simply RIGHT CLICK on the connection listing and select the BOOKMARK option from the Right Click Menu.  Now your FTP connection will show up as a Bookmark in Nautilus (left side menu)


Saturday, December 14, 2013

Nautilus Extension For Quick Image Editing

Every want to right click an image in Nautilus and change it's size, rotate it, or convert its format?  If so then the IMAGE TOOLS Nautilus Extension is for you.  This extension lets you perform the following actions:

Resize, rotate or flip images
Convert images to or from:  bmp, gif, jpg, pcx, png, tif, and more
Enhance Images: brightness/color/contrast/sharpness
Add Effects: black and white, blur, border, contour, grey scale, negative, shadow, vintage or watermark.

To install it, OPEN A TERMINAL WINDOW and type the following command, pressing ENTER after each one:

     sudo add-apt-repository ppa:atareao/nautilus-extensions 

     sudo apt-get update


     sudo apt-get install nautilus-image-tools

     nautilus -q

DONE!!!

To use it just open Nautilus, right click on an image file and scroll down the list until you find the IMAGE TOOLS option.

It's not Photoshop or Gimp but for a quick edit here or there it works just fine.


Wednesday, December 11, 2013

Remove and Reinstall Your Video Drivers (Nvidia)

After my Linux Kernel Upgrade to 3.2.0-57 I had to reboot.  On reboot I got a Black TERMINAL SCREEN asking for my USER NAME and PASSWORD.  Even after giving my user/password I was still stuck at the TERMINAL Screen.  Last time this happened it was a problem with my video driver (Nvidia).  So I tried this fix again and it worked!  Here's how;

1.  At the Terminal Screen type the following and hit ENTER;

     sudo apt-get purge nvidia* 

2. That removes your Nvidia Drivers, once it runs (it takes about 10 minutes and runs several lines in the Terminal) we reinstall the current Nvidia Driver with the following command;

  sudo apt-get install nvidia-current-updates-dev 

3.  Once this command runs, just reboot your system and you should be good to go.


Monday, November 04, 2013

Change ALT - LEFT CLICK Behavior

I've got Photoshop CS2 installed on my Ubuntu 12.10 system running under Wine.  It worked just fine but some upgrade change the behavior of the ALT Left Click combo to a Drag Window function. This was affect everything, that used ALT Left Click, so it had to be changed.  Here's How:


1.  Open a Terminal Window and type:
     sudo aptitude install compizconfig-settings-manager  <ENTER>

2.  Once it installs, start CompizConfig Settings Manager and navigate to the following menus

-->Window Management
------>Move Window
----------->Initiate Window Move (Mouse Picture beside it)


3.  Change that setting to any unused key/mouse combo
     (I used SHIFT/CTRL/SUPER/MOUSE 3)

Close the CompizConfig Settings Manager and that should do it.

Tuesday, June 18, 2013

Adding self-signed SSL certficates to Google Chrome

Everytime I connect to my work web email server through our VPN I get a SSL Untrusted Certificate Error in Google Chrome and have to click on that annoying red screen that practically begs me not to Proceed.  It's not a BAD Certificate it's just Self-Signed.  You'd think Google would have done like FireFox did and give you a nice CLICK to ADD option to the offending SSL Certificate.

Well really it's not that big a deal but I just have to find fixes to these kind of things.


1.  Open a TERMINAL window.
2.  TYPE sudo apt-get install libnss3-tools (HIT ENTER).
3.  Open GEDIT or any text editor and cut and paste the below text (in green and no blank lines at the top or bottom):

 #!/bin/sh
#
# usage:  import-cert.sh remote.host.name [port]
#
REMHOST=$1
REMPORT=${2:-443}
exec 6>&1
exec > $REMHOST
echo | openssl s_client -connect ${REMHOST}:${REMPORT} 2>&1 |sed -ne '/-BEGIN CERTIFICATE-/,/-END CERTIFICATE-/p'
certutil -d sql:$HOME/.pki/nssdb -A -t TC -n "$REMHOST" -i $REMHOST 
exec 1>&6 6>&-

4.  Save this file in your HOME directory as import-cert.sh and close GEDIT.
5.  Import your SSL by typing the following command into your TERMINAL window.

bash import-cert.sh YOUR.SERVER.NAME 443

6.  Done!


NOTES:  Replace YOUR.SERVER.NAME with your sever's fully quilitified domain name.  If your server is using a different PORT (443 is default) then replace the 443 with whatever PORT your company uses.  Make sure you can connect to YOUR SERVER (connect your VPN?)

Other useful certutil commands (TYPE them in a TERMINAL window):

List all certificates in your database:
certutil -L -d sql:$HOME/.pki/nssdb

To delete a certificate
certutil -d sql:$HOME/.pki/nssdb -D -n <certificate nickname>

Replace <certificate nickname> with the name displayed by the List Certificates command.


FULL CREDIT:  The Bash Script is NOT mine.  I did NOT write it, I found it on THIS SITE and it was written by Peter van der Does (according to the website).  Follow the link and read his article for a description of what all this does.


Sunday, June 16, 2013

Get Your Galaxy S3 Working With UBUNTU 12.04 +


ES File Explorer
Ever since I bought my Galaxy SIII, about a year ago, I've been trying to get it to work with Ubuntu with limited success.  I'd mostly given up on getting the phone to connect through the USB cable because I'd found a great Android App that connected to my Ubuntu Box through WiFi and SMB File Shares.

That program is called ES File Explorer and is a very useful, free, Android App.  It will connect to Ubuntu SMB Shares, Window Workgroup Shares, Windows Domain Shares, FTPs and Cloud Storage Services (Gdrive, Box, DropBox, and even SkyDirve) allowing file transfers between your portable device (phone) and your remote storage options.  I highly recommend it as an Android File Manager.

Well I thought I'd try to get my Galaxy S3 to connect with the USB cable again.  Here's the problem, Android 4 + uses MTP protocol (Media Transfer Protocol) instead of just mounting as a removable drive (like a USB Thumb Drive or Camera SD Card).  The MTP protocol was created by Microsoft so we can blame them :-)

Here's what we need to do, we need to get Ubuntu to use the MTP protocol.  We will need to use GVFS, the Gnome Virtual File System, which is built into Ubuntu 13.04 (I think) but has been backported to Ubuntu 12.04 and 12.10.  Lets Add GVFS.

1.  Open a Terminal Window

2.  TYPE   sudo add-apt-repository ppa:langdalepl/gvfs-mtp (hit enter)

3.  TYPE   sudo apt-get update (hit enter)

4.  TYPE  sudo apt-get upgrade (hit enter)

5.  Reboot your Computer.  I REPEAT, REBOOT YOUR COMPUTER !!!

PHONE CHANGES

6.  Turn the USB Debugging Mode ON in your Android Phone/Device.
      a.  On your phone/device goto SETTINGS.
      b.  Scroll down to DEVELOPER OPTIONS and select it.
      c.  About the 4th item down will be a check block labeled USB DEBUGGING
      d.  Check USB DEBUGGING (turn it on)

Done!  Plug your Android 4 + Device into your Ubuntu 12.04 + box and you should now be able to access your Android Device with Nautilus (File Manager).

If your phone memory card doesn't show up, make sure it's on and UNLOCKED. (enter your pass code while your phone is connected)  

NOTE:  Although I've used these steps to connect a Samsung Galaxy S3 on the Sprint Network running Android 4.1.2 to an Ubuntu 12.04 box, this method should work with other Android 4+ devices  like tablets (Nexus 7, 10s) and other Android 4+ phones (HTC One, etc...) and will work on Ubuntu 12.10.  The only thing is, this is about the 3rd time I've tried to do this and I did not Undo the other attempts before trying this.  The other attempts got my phone to show up in Nautilus and listed the file structure but not any files and did not allow file transfers. Some of the prior attempts may have changed things that I did not list here. 


Sunday, January 20, 2013

Error: API mismatch: the NVIDIA kernel module

I was trying to get STEAM working on Ubuntu 12.04.  I downloaded and installed the STEAM App and when I started it, it told me I had to upgrade my Nvidia Driver from version 295.40 to version 304.43 or 310.11.  It gave me nice instructions, which I followed and it looked like it worked.  Ubuntu said it need to reboot to complete the driver update, which I did.

On reboot I was greeted with a Black TERMINAL SCREEN asking for my USER NAME and PASSWORD.  Even after giving my user/password I was still stuck at the TERMINAL Screen.  Well I remembered the command STARTX, which I tried.  That's when I got the following ERROR MESSAGE;

"Error: API mismatch: the NVIDIA kernel module has version 295.49, but this NVIDIA driver component has version 310.11. Please make sure that the kernel and all NVIDIA driver components has the same version."

No matter what I did I could not get Ubuntu to boot into a GUI.  I knew this was a Video Drive Issue so I began my Google Searches.  Many of the things I found involved editing your  /etc/X11/xorg.conf file, which I was afraid to do.  After reading several articles I pieced together how to remove and reinstall your Nvidia Video Driver from a Terminal Screen.  Here's how;

1.  At the Terminal Screen type the following and hit ENTER;

     sudo apt-get purge nvidia* 

2. That removes your Nvidia Drivers, once it runs (it takes about 10 minutes and runs several lines in the Terminal) we reinstall the current Nvidia Driver with the following command;

  sudo apt-get install nvidia-current-updates-dev 

3.  Once this command runs, just reboot your system and you should be good to go.


As a bonus, this Driver Removal and Reinstall lets the STEAM APP start working.  I'll do a post on STEAM and it's Linux Game Selection once I get a chance to play with it a little.

Monday, January 07, 2013

A Better Weather Application


A few posts ago I told you how to add a nice little weather indicator to your Ubuntu top bar.  I was surprised that that post was one of my most viewed.  That little app was called WEATHER INDICATOR and was nice then but has since developed a few flaws (forecast stopped working being the biggest).  Since I now know that I'm not the only one who wanted to know the weather from my desktop I went searching for another weather app.  Well I found a very nice one and it's called MY-WEATHER-INDICATOR.


What I like about this one is that it gives you the option to add cell phone like widget to your desktop that tell's you the time, weather and forecast at a glance.  You don't have to have the widget and can just have the nice little top bar weather like the old one I posted but it's nice to have the option.

Want to see it in action, here's a link to a video by UbuntuHelpGuy.

If you've stayed with me this far I can only assume you want this too!  Here's how.

Step 1
Open a TERMINAL windows and type the following:

Step 2
sudo add-apt-repository ppa:atareao/atareao    (HIT ENTER and TYPE your PASSWORD)

Step 3
sudo apt-get update  (HIT ENTER and TYPE your PASSWORD)

Step 4
sudo apt-get install my-weather-indicator  (HIT ENTER and TYPE your PASSWORD)

Step 5
Close the TERMINAL window once it's done.

Step 6
Go to your DASH HOME on the UNITY BAR (left side, top).

Step 7
In the SEARCH BAR type in WEATHER and you should see the application My-Weather-Indicator.

Step 8
Click on its Icon, running the program, and fill out the preferences.


Check the SHOW WIDGET option on the LOCATION tab and pick SUPER in the drop down to get the weather gadget to appear on your desktop.


 Don't forget to check the AUTOSTART block on the GENERAL OPTIONS tab to make My-Weather-Indicator start on boot.

Make sure to play with the app as it's running on your Top Bar because it has lots of options, including weather maps and sunset/rise info.

NOTE: if you followed my older post on how to install the WEATHER INDICATOR app, you should uninstall it or you will have WEATHER INDICATOR and MY-WEATHER-INDICATOR both running on your TOP BAR.  To uninstall the old WEATHER INDICATOR start UBUNTU SOFTWARE CENTER and search for WEATHER INDICATOR and click on the REMOVE button on the left.  I had to reset after the uninstall to get the old app to go away.  I'm sure there was some Terminal Command I could have ran but resetting was easy.

Saturday, December 29, 2012

Android Tip: Advanced Map Viewer


If you own an Android Phone (Or Tablet) and want to use it as a GPS with Maps while you travel but don't want to eat up all your Data Plans 5gb limit or be dependent on having Cell Signal or maybe your Android Tablet doesn't have Cell Data Service, here's a nice solution.

Download ADVANCED MAP VIEWER (AdvancedMapViewer.apk)

You can download this directly onto your Android Device or to your computer and transfer the file to your Android Device.  Then use whatever File Viewer Program you are use to using on your Android Device to RUN the  AdvancedMapViewer.apk file on your Android Device. (My favorite is ES File Explorer File Manager) Google Play Link

Running the 
AdvancedMapViewer.apk file will install the Advanced Map Viewer App on your Device.  (Note you may have to go to SETTING --> SECURITY and CHECK the UNKNOWN SOURCES option in order to do the install on your Android Device).
Now create a FOLDER on your Android Device called MAPS (or something you can remember)
Then go to ftp://download.mapsforge.org/maps/north-america/us/ and download any maps that you want to keep on your Android Device. (They are listed by state and run about 60mb each on the average and have a .MAP extension).  Once again you can download these .MAP files straight to your Android device or to your computer then transfer them to your Android Device.  You should put the .MAP files in the FOLDER (MAPS) you created earlier.
Finally just run the ADVANCED MAP VIEWER app, pick the folder where you put your maps and your done.  
Once the app starts, you can click (tap?) the "Bulls Eye" icon on the top/middle of the apps screen to use your GPS to start tracking.

You now have complete state maps and don't have to use any data or even have cell service.
BONUS:  You can use these .MAPS with the c:geo app if you do any GeoCaching.  

1. To set C:GEO to use the offline maps you do not need the ADVANCED MAP VIEWER APP just the .MAP files for the states you want to keep on your phone.  


2. Start the C:GEO App.  Use your MENU Button to go to SETTINGS.  Scroll down in the settings menu and find the MAP SOURCES section (probably set to GOOGLE MAPS).  

3. There should be a DIRECTORY WITH OFFLINE MAPS section.  CLICK on the "..." and pick the Folder on your phone or tablet where you put the .MAP files.  Your MAP SOURCES should now be "OSM: Offline-MAPNAME".

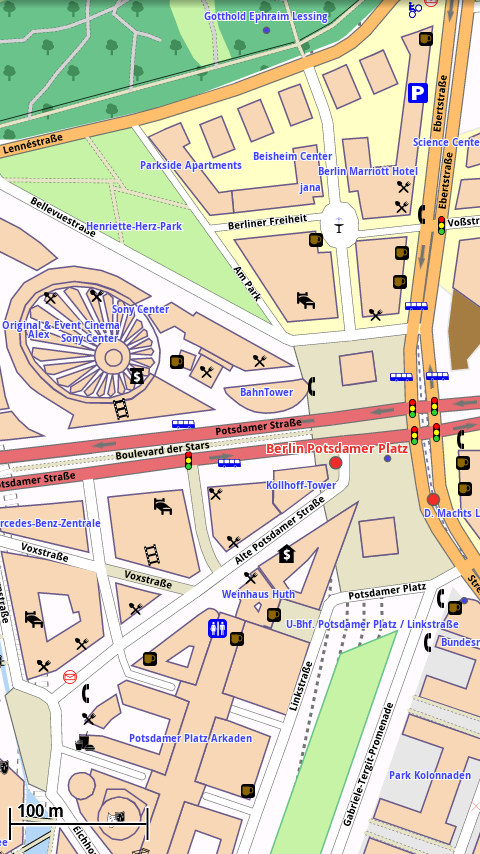
The screenshot are taken from the Apps Homepage