My Iphone 7 ios version 10.3.3 would not show me my photos or videos when I plugged it into my Ubuntu 16.04 box. And I couldn't transfer anything on or off the phone. This was really annoying and I wanted it fixed. So I started Googling for answers and found very few.
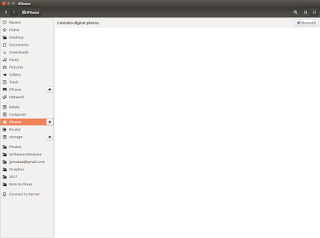
The picture to the right is what showed up in Nautilus when I plugged in the Iphone and hit the TRUST button on the phone.
Yep that's right, nothing showed up. But we won't leave it at that, let's get access to our photos again.
Before we start, I want you to know that you should read through these instruction before you just start copying and pasting. You will be using the MAKE command a few time and need to pay attention to what you're doing. There are 21 steps, many with 5 or 6 substeps, that you will have to complete, and most are done in a Terminal Window (CLI). This is NOT a simple copy and paste howto.
MAKE SURE YOUR IPHONE IS NOT PLUGGED INTO YOUR COMPUTER
1. Open a Terminal Window and type:
sudo apt-get install ideviceinstaller python-imobiledevice libimobiledevice-utils python-plist usbmuxd
(Hit Enter)
If your Iphone iOS version is 8 or back, then skip steps 2 thru 17
and type the following then continue with step 18. If your iOS 9 +
then skip this and goto Step 2 and complete all steps:
sudo apt-get install libimobiledevice6 libplist3 ifuse
(Hit Enter)
2. In the
Terminal Window type:
sudo apt-get install libtool autoconf automake
(Hit Enter)
3. Type the following in your
Terminal Window:
sudo apt-get install libxml2-dev python-dev
(Hit Enter)
4.
Download the latest version of libplist from Here.
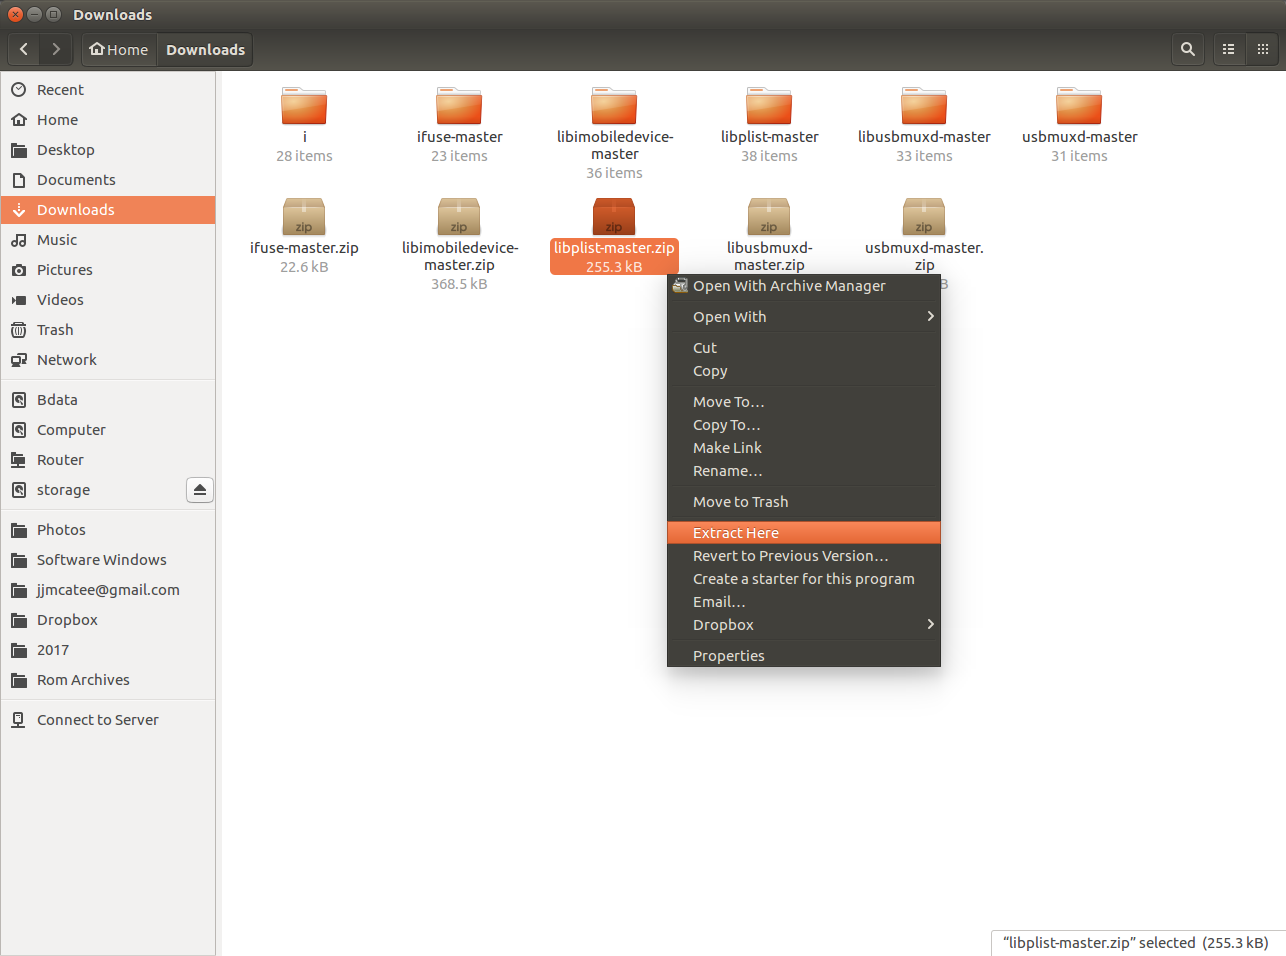
5. Extract the file you just downloaded (
libplist-master.zip)
A. Open Nautilus and browse to the directory where the file
libplist-master.zip was placed.
Mine was put in my Downloads directory.
B. Right Click on the
libplist-master.zip file and select
EXTRACT HERE from the right click
menu.
This will extract the files and create a directory called libplist-master.
C. Browse to this newly created directory in your
Terminal Window.
Mine was located here:
cd $HOME/Downloads/libplist-master
(Hit Enter)
D. Once in the
libplist-master Type the following in your
Terminal Window:
./autogen.sh
(Hit Enter)
E. When
Step D finishes Type the following in your
Terminal Window:
make
(Hit Enter)
F. Type the following in your
Terminal Window:
sudo make install
(Hit Enter)
6.
Download the latest version of libusbmuxd from here
7. Extract the file you just downloaded (
libusbmuxd-master.zip)
A. Open Nautilus and browse to the directory where the file
libusbmuxd-master.zip was placed.
Mine was put in my Downloads directory.
B. Right Click on the
libusbmuxd-master.zip file and select
EXTRACT HERE from the right click menu.
This will extract the files and create a directory called libusbmuxd-master.
C. Browse to this newly created directory in your
Terminal Window.
Mine was located here:
cd $HOME/Downloads/libusbmuxd-master
(Hit Enter)
D. Once in the
libusbmuxd-master Type the following in your
Terminal Window:
./autogen.sh
(Hit Enter)
E. When
Step D finishes Type the following in your
Terminal Window:
make
(Hit Enter)
F. Type the following in your
Terminal Window:
sudo make install
(Hit Enter)
8. Install the build dependencies by Typing the following in a
Terminal WIndow:
sudo apt-get install libssl-dev
9.
Download the latest version of libimobiledevice from here
10. Extract the file you just downloaded (
libimobiledevice-master.zip)
A. Open Nautilus and browse to the directory where the file
libimobiledevice-master.zip was placed.
Mine was put in my Downloads directory.
B. Right Click on the
libimobiledevice-master.zip file and select
EXTRACT HERE from the right click menu.
This will extract the files and create a directory called libimobiledevice-master.
C. Browse to this newly created directory in your
Terminal Window.
Mine was located here:
cd $HOME/Downloads/libimobiledevice-master
(Hit Enter)
D. Once in the
libimobiledevice-master Type the following in your
Terminal Window:
./autogen.sh
(Hit Enter)
E. When
Step D finishes Type the following in your
Terminal Window:
make
(Hit Enter)
F. Type the following in your
Terminal Window:
sudo make install
(Hit Enter)
11. Install
usbmuxd by first, uninstall the old, then installing the new version of
usbmuxd. Type the following into a
Terminal Window:
sudo apt-get remove usbmuxd
(Hit Enter)
sudo apt-get install libimobiledevice-dev libplist-dev libusb-dev libusb-1.0.0-dev libtool-bin libtool
(Hit Enter)
12.
Download the latest version of usbmuxd
13. Extract the file you just downloaded (
usbmuxd-master.zip)
A. Open Nautilus and browse to the directory where the file
usbmuxd-master.zip was placed.
Mine was put in my Downloads directory.
B. Right Click on the
usbmuxd-master.zip file and select
EXTRACT HERE from the right click menu.
This will extract the files and create a directory called usbmuxd-master.
C. Browse to this newly created directory in your
Terminal Window.
Mine was located here:
cd $HOME/Downloads/usbmuxd-master
(Hit Enter)
D. Once in the
usbmuxd-master Type the following in your
Terminal Window:
./autogen.sh
(Hit Enter)
E. When
Step D finishes Type the following in your
Terminal Window:
make
(Hit Enter)
F. Type the following in your
Terminal Window:
sudo make install
(Hit Enter)
14. Install ifuse
sudo apt-get install libfuse-dev
15.
Download the latest version of ifuse from here
16. Extract the file you just downloaded (
ifuse-master.zip)
A. Open Nautilus and browse to the directory where the file
ifuse-master.zip was placed.
Mine was put in my Downloads directory.
B. Right Click on the
ifuse-master.zip file and select
EXTRACT HERE from the right click menu.
This will extract the files and create a directory called ifuse-master.
C. Browse to this newly created directory in your
Terminal Window.
Mine was located here:
cd $HOME/Downloads/ifuse-master
(Hit Enter)
D. Once in the
ifuse-master Type the following in your
Terminal Window:
./autogen.sh
(Hit Enter)
E. Type the following in your
Terminal Window:
./configure
(Hit Enter)
E. When
Step D finishes Type the following in your
Terminal Window:
make
(Hit Enter)
F. Type the following in your
Terminal Window:
sudo make install
(Hit Enter)
17. Type the following in your
Terminal Window:
usbmuxd
(Hit Enter)
18.
PLUG IN YOUR IPHONE NOW
19. Type the following in your
Terminal Window:
dmesg | grep ipheth
(Hit Enter)
You should see some info in your Terminal Window. If not unplug your iphone and try to run these commands again. You may have hit the TRUST popup on your Iphone too.
usbmuxd
(Hit Enter)
dmesg | grep ipheth
(Hit Enter)
20. Creating a mount point by typing the following into your Terminal Window:
sudo mkdir /media/iPhone
(Hit Enter)
sudo chmod 777 /media/iPhone
(Hit Enter)
21. Edit your ifuse configuration file by typing the following into your
Terminal Window
sudo gedit /etc/fuse.conf
Once the fuse.conf file opens in gedit, add the following two lines directly under the line that reads
# Allow non-root users to specify the allow_other or allow_root mount options:
Add these two line under the
#Allow non-root...
op$
user_allow_other
When done these should be your last three lines:
# Allow non-root users to specify the allow_other or allow_root mount options:
op$
user_allow_other
Save the fuse.conf file and exit out of the editor.
The work part it done. Now we can Pair our Iphone so that we can once again transfer pictures and other files to and from our Iphone on Ubuntu 16.04.
Pairing the iPhone
1. Type the following into your
Terminal Window;
idevicepair pair
(Hit Enter)
2. Mount your Iphone by typing the following into your
Terminal Window;
ifuse /media/iPhone
(Hit Enter)
You can now get to your files on your Iphone through the
Nautilus File Browser. You should see an Iphone directory link on the left side panel in Nautilus.
Unpairing the Iphone
1. Now to Unmount/Unpair your Iphone, Open a Terminal Window and type the following
fusermount -u /media/iPhone/
(Hit Enter)
idevicepair unpair
(Hit Enter)
That's it, we're done, easy wasn't it :-)
NOTES: You have to do the Pairing and Unpairing steps every time you connect your Iphone (Last 4 steps on this page). I know that's a pain is the ass but hey you got access at least. I wrote two BASH scripts (connect and disconnect) and make desktop shortcuts for those BASH scripts. Now I plug my Iphone into my Ubuntu 16.04 box, Click on the CONNECT shortcut (minding the TRUST button) and I'm good to go. When I'm done I just click on the DISCONNECT shortcut and unplug the Iphone. This howto was put together from several Google searches but most of it was from here. To encourage you to read his article too, he tells you what to do if you've rooted your iphone so you can get full file system access.
UPDATE: HERE ARE THE BASH SCRIPTs
I've had several requests for the connect / disconnect BASH scripts so here they are:
CONNECT SCRIPT.
Open a text editor and type the following into a blank file.
#!/bin/bash
idevicepair pair
ifuse /media/iPhone
echo "Iphone Connected"
Now save this file to your HOME directory as
connect.sh
DISCONNECT SCRIPT
Open a text editor and type the following into a blank file.
#!/bin/bash
fusermount -u /media/iPhone/
idevicepair unpair
echo "Iphone Disconnected"
Now save this file to your HOME directory as
disconnect.sh
To execute the connect command bash script you run the follow command in Terminal;
bash connect.sh
To execute the disconnect command bash script you run the follow command in Terminal;
bash disconnect.sh
But most you will want to make desktop shortcuts to these commands so that you can just click on a "connect" icon on your desktop and when done click on a "disconnect" icon.
Here's how to get Desktop Shortcuts
1. Open a Terminal Windows and run the following commands (
RED)
sudo apt update
(HIT ENTER)
sudo apt install gnome-panel
(HIT ENTER)
gnome-desktop-item-edit --create-new ~/Desktop
(HIT ENTER)
One you run that last command the following window should popup (with blank data in the fields)
You need to make the following changes for the CONNECT command;
TYPE: Application in Terminal
NAME: Connect Iphone (or whatever you want your shortcut called)
COMMAND:
bash connect.sh
COMMENT: (What ever you want to say about this shortcut or just leave it blank)
Once the changes are made click
OK.
NOTE: you can click on the terminal icon (upper left black square with ">:_" in it) This will let you browse your computer and pick an icon or graphic of your choice. This is the icon that will show up on your desktop.
The parts in RED must be typed exactly as I have them here.
Open a Terminal windows an re-run:
gnome-desktop-item-edit --create-new ~/Desktop
(HIT ENTER)
You need to make the following changes for the DISCONNECT command;
TYPE: Application in Terminal
NAME: Connect Iphone (or whatever you want your shortcut called)
COMMAND:
bash disconnect.sh
COMMENT: (What ever you want to say about this shortcut or just leave it blank)
Once the changes are made click
OK.
The parts in
RED must be typed exactly as I have them here.
NOTE: you can click on the terminal icon (upper left black square with ">:_" in it) This will let you browse your computer and pick an icon or graphic of your choice. This is the icon that will show up on your desktop.