Thursday, December 05, 2019

Brothers DLL2300D Slow Printing

My Brothers HLL2300D printer started printing very slowly (taking a long time to start printing).  Sometimes it would take up to 10 to 15 minutes per page to print.  When I installed it that was not the case.  Before I tell you how I fixed mine let me say that there are many factors that may affect this problem, i.e. (different CUPPS configurations, printer types, installed software or unique hardware) this is just what fixed my situation. 

My setup:
I have my printer (Brother HLL2300D) connected to an IO Gear Print Server (basically a TCP/IP connection device, 10/100 network port on one side and a USB port on the other).  The printer is connected to the USB port and the 10/100 Network port is hardwired to my router.
I'm running Ubuntu 16.04.3, this is a screen shot of the IO GEAR print server web interface and I installed my Brothers HLL2300D using this method.

-------------------------------------------------------------------

THE FIX.


To fix my issue I just added a new printer to my Ubuntu 16.04 install using the following method:

Open your SYSTEM SETTING then PRINTERS then click on the ADD BUTTON.  Now click on NETWORK in the drop down list and finally select APPSOCKET/HP JETDIRECT.  You should see something that looks like this.

Under HOST put the IP ADDRESS of your printer (we're just doing a networked printer).  Under PORT put 9100 and the CONNECTION section should read APPSOCKET/HP JETDIRECT.  Click on the FORWARD BUTTON.


You will now see this screen.  Just select your printer manufacturer and click on the FORWARD BUTTON.


You will now see this screen.  Just pick your printers model number and click on the FORWARD BUTTON. If you are installing a Brothers HLL2300D cancel out of all this and follow these instructions first so that your model's drivers will show up here.


You will now see this screen.  Just fill in the three block with whatever you want for labeling your printer.  When finished just click on the APPLY BUTTON


If you did everything correctly you should now see a new printer with the name you gave it (I changed mine's name to HLL2300Dnew.  By RIGHT CLICKING on that printer and selecting PROPERTIES you will see the following screen (your's should look like mine except your printers IP address will be different from mine and I've blacked out the last digits of that IP address)

Try printing a test page and see if it starts prints quicker.  If the PRINT TEST PAGE is grayed out, close the properties window and RIGHT CLICK on your new printer again and make sure the ENABLED is checked, if not check it and try the PRINT TEST PAGE again.  You may have to reset your computer to finish this but I didn't.


NOTE:  I think selecting the APPSOCKET/HP JETDIRECT is what fixed my problem or maybe it was just installing a new printer, I don't know but it worked for me.  If this worked for you, you may want to set your new printer to your DEFAULT. 


Thursday, October 03, 2019

apt-get update - stops at "0 [ Connecting to us.archive.ubuntu.com ]"


I've been trying to update my UBUNTU 16.04 and it kept hanging up and not completing the updates. So I opened a TERMINAL window and typed in the following command, which is one of the two commands you use to update Ubuntu from the command line.

    sudo apt-get update

When pressing ENTER after typing in this command you will see a list of software sources that Ubuntu is checking to see if there are any updates you need for the software you have installed and there will be a percentage completed number at each line.  Well I noticed that mine was getting stuck at the following line and kept reading 0%

0 [Connecting to us.archive.ubuntu.com]

Without the list of what software you need to download and install you can't use the second command to finish your updates;  sudo apt-get upgrade

--------------------------------------------------------------

To fix this you have to edit the gai.conf file.  To do this open a TERMINAL window and type;

sudo gedit /etc/gai.conf

This will launch GEDIT and open the gia.conf file.  Now you have to be CAREFUL here because there is another line that looks almost like the one you have to change, you have to change just ONE line, you have to find the line;

     #precedence ::ffff:0:0/96  100

now just delete the # which uncomments it.  Change it to;

     precedence ::ffff:0:0/96  100

Now save the file and your done.

NOTE:  There is another line that reads #precedence ::ffff:0:0/96  10 DO NOT CHANGE THIS LINE.  You are looking for the line that ends with a 100.


In case you are wondering this what is causing the problem.  This is from the Ask Ubuntu article where I found the solution.

"ISPs are starting to setup an internal IPv6 network in preparation for eventually connecting to the IPv6 internet. As a result, servers in this network now try to connect to *.ubuntu.com via its IPv6 address by default when running apt-get. Solution: uncommenting precedence ::ffff:0:0/96 100 allows requests to prefer IPv4"

Thursday, September 26, 2019

Linking AppImages to a File Type

I installed CURA 4.3 on Ubuntu 16.04 and it only comes as an AppImage file.  I don't mind the concept of AppImage's  "single file contains everything needed to run the program" but I couldn't get it to associate with the .STL file format.   It wouldn't come up as one of the OPEN WITH options after right clicking on an .STL file.

To fix this you will need to open GEDIT or your favorite text editor (I use GEANY) then;

1. Create a new blank file.

2. Copy and paste the following into this new blank file.

[Desktop Entry]
Encoding=UTF-8
Name=Cura
Comment=Cura 3D slicing application.
Exec={INSERT PATH TO APPIMAGE} %F
Type=Application
Icon={INSERT PATH TO ICON}
Categories=Graphics; 
MimeType=image/CURA;

3.  Replace the {INSERT PATH TO APPIMAGE} with the path to your AppImage file and the name of your AppImage file.  The COMMENT and NAME should be replaced with info and description name of your AppImage file (the NAME is what will appear in your OPEN WITH list when you right click on a file in Nautilus.

The {INSERT PATH TO APPIMAGE} line looks like this in mine:
Exec=/home/jeff/AppImages/Ultimaker_Cura-4.3.0.AppImage %F

*** NOTE:  The official recommendation by the AppImage developers is to create an extra directory, ${HOME}/Applications/ (or ${HOME}/.local/bin/ or ${HOME}/bin/) and store all AppImages there.  But as you can see I did not follow this recommendation. You can put AppImages anywhere and they'll work, even USB drives.

4.  Replace the {INSERT PATH TO ICON} with the path to the icon image you want to associate with your AppImage program.

This line looks like this in mine:
Icon=/home/jeff/Pictures/Icons/Cura.png

*** NOTE:  I keep all my Icons in this folder to make them easy to find

5.  Save this file to your Downloads directory as a .desktop file, I called mine CURA.DESKTOP.  You can name yours whatever you want but the .desktop part must be there.

6. Now we make your new .desktop file executable by opening Nautilus (Files) and right clicking on your new .desktop file.  Now select the PERMISSION tab and check the "Allow executing file as Program" box.


7.  Now we need to copy your new .desktop file to the /usr/share/applications/ folder.  This has to be done in TERMINAL because of permissions.

    A.  Open a TERMINAL window.
    B.   Then type the following. (Assuming your .desktop file is in Downloads directory)

           cd Downloads

           sudo cp cura.desktop /usr/share/applications/

           * Hit ENTER KEY after each of these two commands and enter your password if asked.

           *** NOTE:  you will need to replace cura.desktop with name of your .desktop file you created in steps 1 - 6 .


8. After it copies just close the TERMINAL window.

9.  Now we need to edit the mimeapps.list that is locate in your HOME directory under the .config directory.

10.  Open Nautilus (Files) and select VIEW and check SHOW HIDDEN FILES


11.  Now navigate to home/YOURuserNAME/.config/ and open the file mimeapps.list with GEDIT or your favorite text editor.

Mine was located here;
home/jeff/.config/mimeapps.list

12.  Once mimeapps.list is open in your text editor add this line under the section [Added Associations]

image/cura=cura.desktop;

***Note:  Replace cura.desktop with the name of your .desktop file.

13.  Save mimapps.list and close your text editor.

14.  Last step; find an .stl file and right click on it and choose CURA as the default app under OPEN WITH.


I hope this  helps someone out. There might be an easier way but I don't know what it would be.

*** NOTE:  This should work with any file type you would wanted associated with a program.  Basically just replace Cura with your your program and .stl with your file type.  It would be nice if there was a little more integration between AppImages and your OS but I guess that is the point AppImages "one file, run anywhere".  To uninstall AppImages just delete that single AppImage file (and undo all this file association I just showed you :-)


Monday, April 08, 2019

Kernel Panic - not syncing: VFS: Unable to mount root fs.

I was getting an error while running Ubuntu 18.04 in Virtualbox 6.0.  The error "Kernel Panic - not syncing: VFS: Unable to mount root fs...".  The error occurred after a failed system update. 


To fix this I had to pick ADVANCED in the GRUB menu on startup of the virtual and pick a previous working kernel version to boot with.  This booted me with an older version of the kernel but it was functioning. 


I then started a TERMINAL and typed the following two commands:

sudo update-initramfs -u -k VERSION* 

sudo update-grub 

Replace VERSION* with the name of the version giving you the panic error, in my case it was 4.15.0-47-generic.  So my command was: sudo update-initramfs -u -k 4.15.0-47-generic

That's it, you should be able to restart the system and it will boot normally.   If it doesn't here's a link to an article that may provide more help on this topic. LINK HERE And here is a link to the GRUB2 manual.  GRUB2 Manual


NOTE: the 2nd picture is of an older version of GRUB and is only there to give you an idea of what you'll see.  It is not a capture of my screen (I forgot) so this is just a googled image used as an example to aid you.

Tuesday, January 08, 2019

PUBLIC KEY NOT FOUND - WINE

I was getting the error PUBLIC KEY NOT FOUND for WINE when I tried to update Ubuntu.  To fix it I  ran the following four commands in the Terminal.  Hit ENTER after each command and type in your password when prompted.

wget -nc https://dl.winehq.org/wine-builds/winehq.key

sudo apt-key add winehq.key

sudo apt update

sudo apt-get upgrade


This should fix the PUBLIC KEY problem and update your system.  
NOTE:  The first two commands fix the Public Key issue, the last two commands update your software and you can use just them (the last two commands) anytime you want to update your system from the Terminal.


Wednesday, June 06, 2018

Ubuntu 16.04 - Brothers HL-L2300D Laser Printer Setup

I wanted a Laser Printer that would worked with Ubuntu and Windows 10.  After a little research I settled on the Brothers HL-L2300D Laser Printer which I got for $89 on Amazon.

I used the included installation CD for my Microsoft Windows 10 machines (both VirtualBox and Laptop).  It was a typical Windows install and went without problems.

On my Ubuntu 16.04 box, after a few Google searches, I found the drivers and instruction on Brothers Support Site.  When you get to the site you have to select the Linux and Linux (deb) options then click on the SEARCH button.


Once you hit the SEARCH Button you will be taken to the DOWNLOADS Page.  Select the DRIVER INSTALL TOOL.


On the next page click on the AGREE TO EULA AND DOWNLOAD which will download the file linux-brprinter-installer-2.2.0-1.gz  to your Downloads directory and display a page with install Instructions.  Just follow those instructions and you'll be good to go.  I'll paste those instruction as I used them to install the drivers for the Brothers HL-L2300D Printer.

-----------------------------------------------------------

Step 1. Download the tool.(linux-brprinter-installer-2.2.0-1.gz)

The tool will be downloaded into the default "Downloads" directory.
(The directory location varies depending on your Linux distribution.)
e.g. /home/(LoginName)/Downloads

Step 2. Open a terminal window.

Step 3. Go to the directory you downloaded the file to in the last step. By using the cd command.

   cd Downloads

Step 4. Enter this command to extract the downloaded file:

   gunzip linux-brprinter-installer-2.2.0-1.gz

Step 5. Get superuser authorization with the "su" command or "sudo su" command.

   sudo su

Step 6. Run the tool:

   bash linux-brprinter-installer-2.2.0-1 HL-L2300D

Step 7. The driver installation will start. Follow the installation screen directions.

 When you see the message "Will you specify the DeviceURI ?",

 For USB Users: Choose N(No)
 For Network Users: Choose Y(Yes) and DeviceURI number.


NOTE:  My printer is hooked up to my network via an I/O GEAR USB to NETWORK printer share device and not plugged directly into my computer via USB, so I choose Y(yes) and when asked for my DeviceURI, I entered socket://192.168.1.90:9100 which is the IP Address/port of my printer share device.  

You can also just select N(no) and after the Terminal Program is done, go into SYSTEM SETTING then PRINTERS then Right Click on your newly installed printer and select Properties and make your network changes there.


-------------------------------------------------------------------------------

I hope this helps as I had trouble finding a printer that worked with Ubuntu 16.04.  From looking at Brothers Support Site it appears that they have Linux drivers for several of their modern Inkjets, laser (color or B/W) and Scanner/Fax/Printers machines.

Saturday, May 12, 2018

Virtualbox 5.2.12 - Host Ubuntu 16.04 with a Guest Ubuntu 18.04 - Getting Guest Additions working after update.

I wanted to experiment with Ubuntu 18.04 before I committed to it on my production machine so I installed it on a virtual machine using Virtualbox. My HOST system is Ubuntu 16.04 and the Ubuntu 18.04 is the GUEST. Everything was going fine until Virtualbox upgraded to 5.2.12.

Usually when Virtualbox upgrades it prompts you to upgrade your GUEST ADDITIONS which gives you better screen resolutions, shared clipboards, seamless mode and other very useful stuff. My Windows 10 GUEST did just this and worked just fine, however the Ubuntu 18.04 GUEST would not Mount the Guest Additions ISO.

The solution I found was to install the Guest Additions via the Terminal (Command Line) in the Guest Ubuntu 18.04. Once again RUN THESE TERMINAL COMMAND IN YOUR GUEST UBUNTU 18.04 not you host Ubuntu 16.04.


sudo apt-get update

sudo apt-get install virtualbox-guest-dkms


After running these two commands on the GUEST 18.04 just restart the GUEST and you should be good to go.

If this does not work for you, here are some more suggestions.

Wednesday, February 14, 2018

DarkTable Tethering - Nikon D7200 - Error 53

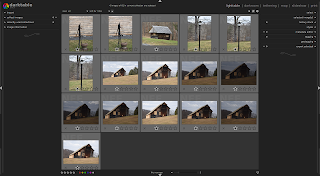
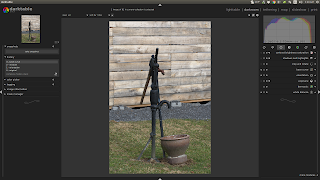
I was trying to connect my Nikon D7200 DSLR camera to my Ubuntu 16.04 box and tether it to DarkTable so that I could control the camera with/from the computer.  When I plugged my camera into the USB port, Ubuntu didn't recognized it but mounted the camera's two memory cards as removable hard drive.  I could access the memory cards with Nautilus and move files to and from the cards just fine.  However when I launched DarkTable I got the error "Error initializing camera: -53: Could not claim the USB device".  To fix this all I had to do was open Nautilus, right click on the two memory cards and select "Unmount".  After Unmounting the two memory cards I launch DarkTable, selected the Tethering Tab and it worked flawlessly. I'll have to unmount the memory cards every time I plug the camera in but it's not that hard and it works  


For those of you who don't know, DarkTable is photo post processing software.  It competes with Adobe Lightroom and I think you can do more with it than Lightroom.  If you capture your photos with your DSLR camera in the RAW format you adjust the colors, exposures, saturation, and much, much more.  You can still adjust JPG photos too but not as much or as nice as you can with the RAW format.  Trust me, if you've spent the money on a good DSLR camera, capture your photos in RAW.  DarkTable allows you to export your RAW format files (DNG, NIK, CRW, CR2) to JPG's after you've adjusted them.


The RAW format of your DSLR captures and stores much more information than JPG.  So even if you do nothing with RAW images other than convert a copy of it to JPG keep/shoot in the RAW format so that you'll have captured the data to use later when you learn how to use a program like DarkTable.


A Bonus Tip:  If you use Photoshop CS6 (the last own it non-cloud version)  you can install Adobe's Camera Raw Plug-in and get a lot of Lightroom ($10 monthly) / DarkTable (Free) function to use with your RAW images inside Photoshop CS6.  The CS6 version is 9.11 (near the bottom of the page).


Thursday, December 28, 2017

Geeqie - View Raw Images (NEF)

I've been using my Nikon d7200 camera to shoot pictures in the Raw Mode instead of jpg.  The Raw Mode pictures have a file extension of .NEF and the build-in Ubuntu thumbnail viewer doesn't support .NEF files.  I wanted something that would give me a thumbnail view of all my .NEF files in any given directory and give me some options for moving those files around.  I found a nice programs that meets these needs and more, Geeqie


On Ubuntu 16.04 it's in the Software Center so just install it from there.  Once installed you'll have to associate the .NEF files with Geeqie then you can just double click on a .NEF file to open it in Geeqie.

The Destination is Read-Only (SD Card Stuck)

On my Ubuntu 16.04 box, one of my camera's SD CARDS was stuck in READ ONLY mode.  I could copy files from the card but not to it and I couldn't delete any files that were already on it.  The card worked fine in the camera and worked as expected on a MS Windows machine but not on my Ubuntu Box.  In Nautilus I kept getting the ERROR "The Destination is Read-Only" every time I tried to delete old pictures from the card.


I reformatted the SD Card, I changed the partition type in Gparted, I changed its UUID, and I reset the computer but nothing worked (and YES I checked the little "write protect" switch on the SD Card).  My Ubuntu box just refused to allow any writes or deletes from the SD Card. 

I searched (googled) for 2 hours before I came across this little gem in a comment on a discussion on a non-working thumb drive.  Here's what worked for me.

Open a TERMINAL window and type:

        sudo killall nautilus 

That's it.

I don't think you need the "sudo" but what the hell I used it.

Friday, September 08, 2017

Sync MS OneDirve with your Ubuntu 16.04.

Okay confession time, I have a Microsoft OneDrive account.  Yeah it's just the freebie basic 15gb type but I do use it from time to time.  When I needed access to it on Ubuntu (16.04) I would just use their web interface.  Well I thought why not just have it Sync on it's own.

Surprise! Microsoft doesn't make a nice Linux App for syncing but there is a little program called ONEDRIVE-D that works just fine.  You don't get a nice GUI interface or an Indicator App (like Dropbox or Insync) but once installed, just one Terminal Command will start it syncing.  It's kind of a set and forget thing.  You can read more about it here https://github.com/xybu/onedrive-d-old

To get it up and running we need to type the following commands (the ones in RED) into a Terminal Window.  Hit Enter after each command.

Step 1.  Install Git.

sudo apt install git


Step 2.  Copy the onedrive-d files from Git to your computer.

git clone https://github.com/xybu92/onedrive-d.git


Step 3.  Move to the the ondrive-d folder.

cd ~/onedrive-d


Step 4.  Install onedrive-d.

./install.sh


Step 5.  Make a folder in your home directory to sync your OneDrive files to and from.

mkdir -p ~/OneDrive


Step 6.  Configure onedrive-d to work with your online OneDrive Account ( The four (A-D) sub-steps are highlighted in yellow below).

onedrive-perf

After typing the onedrive-pref command, complete the four (4) steps (A-D) below to finish the configurations.

A.  Connect the sync client to your Microsoft account. 
In the terminal window onedrive-perf will display a link which will allow you to authorize your computer to sync with your online OneDrive account.  Just paste the displayed link (the one in the Terminal Window) into your web browser and click on "YES" to authorize onedrive-d to access to your Microsoft OneDrive Account. Don't close your browser, you'll need the URL of the page you were sent to after the authorization process.

B.  Getting the CallBack URL
In your browser select and copy the URL of the Blank webpage you were sent to after authorizing onedrive-d.  Do not copy the "https://" part, copy everything past "https://".  It should have ..."code="... in it. 

C.  Pick the local folder that onedrive-d will sync (copy) all your online files to.
Any files you put in this folder will be uploaded to your Microsoft OneDrive and any files in your Microsoft OneDrive online folder will be downloaded to this folder. This should be the folder we created in Step 5. Use the full path: /home/username/OneDrive/
NOTE: change “username” to your Home Directory or logon name. The default should be right if you did Step 5 correct, but be sure to check it.

D.  The last two settings are the Numeric Settings and the Ignore File List. I entered “n” for no for both of these settings. If you feel you need to edit these settings, choose Y change what you need.


Step 7. Start the onedrive-d deamon.

onedrive-d start

NOTE:  It will continue running in the background, syncing your files.  If you have a lot of files in your OneDrive account give it time to finish the sync on it's first run.


Step 8. 
Start onedrive-d every time we log-in.

Launch the program STARTUP APPLICATIONS  (search for it in your Unity Launcher).  Once it starts, click on the ADD Button and fill in the fields with the following:

NAME: OneDrive
COMMAND: onedrive-d start
COMMENT: Starts OneDrive Sync app


Click on the SAVE Button to finish it.

NOTE: You can put anything you want for NAME and COMMENTS but COMMAND has to be exactly like I have it.


That's it your done!!!  Your computer and your Microsoft OneDrive files should be syncing


--------------------------------------------------------------------------------------------------
Other useful onedrive-d commands:

 onedrive-d start    Start the daemon.
 onedrive-d stop     Stop the daemon.
 onedrive-d restart  Stop then start the daemon.
 onedrive-d status   Get the status of the daemon.


Tuesday, August 15, 2017

How to install Google Chrome Browser on Ubuntu 17.04

How to install Google Chrome Browser on Ubuntu 17.04


Open a terminal window and type the following four commands.  Hit ENTER after each command;


wget -q -O - https://dl-ssl.google.com/linux/linux_signing_key.pub | sudo apt-key add -

sudo sh -c 'echo "deb [arch=amd64] http://dl.google.com/linux/chrome/deb/ stable main" >> /etc/apt/sources.list.d/google.list'

sudo apt-get update

sudo apt-get install google-chrome-stable

That it, your done!!!

VirtualBox: Getting 16x9 resolution in Guest OS

My Host system is Ubuntu 16.04.3.  In VirtualBox I could not get the 16x9 ratio on my Windows 7 guest display.  To fix that;

I. Install Guest Add On for Virtualbox
  1. Power on virtual machine
  2. Click DEVICES on the VirtualBox Menu at the top of the screen
  3. Click "Install Guest Additions CD Image..."
  4. Follow the on-screen prompts.
  5. Restart the virtual machine
II. Once restarted go to FILE on the VirtualBox Menu at the top of the screen.

III. Select PREFERENCES

IV. Select DISPLAY

V. Set MAXIMUM GUEST SCREEN DISPLAY to HINT

VI. Set the WIDTH and HEIGHT boxes to the resolution you want

VI. Restart your virtual machine.


Saturday, August 12, 2017

How to install OpenVPN

How to install OpenVPN and how to make it accessible through the built-in Network GUI on Ubuntu 16.04.3.

Here's how;

1.  Open a Terminal window.

2.  Type the following two commands, hitting ENTER after each.

      sudo apt-get install openvpn

      sudo apt-get install network-manager-openvpn-gnome

3.  That's it, your done with software install part.


To add an openVPN connection make sure you've got your KEY file from your VPN provider, mine had a .opvn extension.

1.  Click on your Network Indicator icon and select EDIT CONNECTIONS.

2.  Click on the ADD button.

3. Click on the little arrow in the Drop Down Box (beside ETHERNET)

4. Select the IMPORT A SAVED VPN CONFIGURATION option.

5.  Browse to and select your .OVPN Key file you got from your VPN provider.

6.  Fill in your USER NAME and PASSWORD and click on the SAVE button.


That's it your done, your VPN has been added.  Just Click on the Network Indicator icon (from step 1) and select VPN Connections and pick your newly created VPN connection to connect to it.


Tuesday, August 08, 2017

Changing the Alt+Left Mouse Click action to work with Photoshop CS2

After doing a fresh install of Ubuntu 16.04.3 and reinstalling WINE 2.01 I couldn't use any of the Photoshop CS2 tools that need the an ALT+Left Mouse Click.  Ubuntu would intercept this key combo and would initiate a Windows Move action instead of the tool action.

To change Alt+Left Mouse Click action from "Move Window" in Ubuntu 16.04.3 you will need to do the following:

1.  Open Ubuntu Software Center, search for and install  CompizConfig Settings Manager or CCSM.

2.  Once installed start CompizConfig Settings Manager and click on the Windows Management button on the left.

3.  Then click on the Move Window option.

4. Now Uncheck the Initiate Window Move which should disable it.

5.  Or you can also select a different Key Combination to activate the Initiate Window Move action if you use that feature or if disabling it doesn't work for you.

Your done.  You should now be able to use your Alt+Left Mouse Click in WINE with Photoshop CS2 or any other app that needs that key combo. (I changed mine to <SUPER><Left Mouse Click> which worked for me).


WINE, Photoshop CS2, "Unable to continue because of a hardware or system error. Sorry, but this error is unrecoverable."

I did a clean install of Ubuntu 16.04.3 including the 4.10 Linux kernel after a system crash.  When I did, I had to do a fresh clean install of WINE 2.01.  I then installed Adobe Photoshop CS2 from an ISO of it's install CD.  It installed just fine with no errors and it booted once.  When I tried to start it a second time it crashes upon startup with an "Unable to continue because of a hardware or system error. Sorry, but this error is unrecoverable." This error now occurs on every time I tried to start it.  Rebooting and nothing else I found fixed this.  After a lot of Googling I found a solution that worked and I figured out how you can avoid this problem altogether.

HOW TO AVOID THIS PROBLEM

To avoid the "unrecoverable hardware error" problem with Photoshop CS2 under WINE do the following BEFORE YOU INSTALL PHOTOSHOP CS2:

1. Search for and install WINETRICKS from you Ubuntu Software Center.

2. Launch (run) WINETRICKS (in Terminal type winetricks)

3. Check the "Select the Default Wineprefix" and click OK.

4.  Check "Install a Font" and click OK.

5. Check all the Microsoft Fonts including CORE FONTS and click OK.

6. Wait until it finishes doing the installs.

7. Once it's finished just install install Photoshop CS2 as usual under WINE.

By installing the Microsoft CORE FONTS first you should have avoided the problem and your Photoshop install should be able to boot every time.


HOW TO FIX THE PROBLEM

If you installed Photoshop CS2 before the CORE FONTS and you've ran it more than once and you're getting the error message "Unable to continue because of a hardware or system error. Sorry, but this error is unrecoverable." do the following to fix it:

Using Nautilus (or your favorite file browser) navigate to:
Replace [USER NAME] with your user name.

/home/[USER NAME]/.wine/drive_c/users/[USER NAME]/Application Data/Adobe/Photoshop/9.0/Adobe Photoshop CS2 Settings/

 NOTE:  In Nautilus you'll have to go to VIEW and select SHOW HIDDEN FILES to see the .wine directory.


Once in the /home/[USER NAME]/.wine/drive_c/users/[USER NAME]/Application Data/Adobe/Photoshop/9.0/Adobe Photoshop CS2 Settings/ directory do the folowing:

1. Delete the corrupted file, Adobe Photoshop CS2 Prefs.psp or rename it.

2. Start Photoshop CS2.

3. After Photoshop CS2 has started and while Photoshop CS2 is running,  navigate back to the /home/[USER NAME]/.wine/drive_c/users/[USER NAME]/Application Data/Adobe/Photoshop/9.0/Adobe Photoshop CS2 Settings/ directory and copy the newly re-created Adobe Photoshop CS2 Prefs.psp file to a safe known location (make a copy of it).

4. Close Photoshop CS2, which will corrupt the Adobe Photoshop CS2 Prefs.psp file in that directory. (this is why we made a copy and put it in a safe known place).

5. With Photoshop CS2 closed, copy our good copy of Adobe Photoshop CS2 Prefs.psp (the one we put in a safe known place in step 3) back to the  /home/[USER NAME]/.wine/drive_c/users/[USER NAME]/Application Data/Adobe/Photoshop/9.0/Adobe Photoshop CS2 Settings/ directory, replacing the corrupt one.

DO NOT RESTART PHOTOSHOP YET DO STEP 6 FIRST.

6.  Now install the CORE FONTS by doing the steps 1-6 in the above HOW TO AVOID THIS PROBLEM section (DO NOT DO STEP 7, don't reinstall Photoshop or you'll just recreate the problem).

That's it, you should now be able to start and use Photoshop CS2 as much as you want now.  But we are still not done.  On Ubuntu the ALT key + Left Mouse Click is mapped to a Move Windows Function and won't let you use it with certain tools in Photoshop (i.e. Clone Tool).  Don't worry we can fix this too but that will be in the next article.

Monday, August 07, 2017

Update to 16.04.3 Broke Nvidia Drivers

I tried to force an update to 16.04.3 with the 4.10 kernel and it crashed my Nvidia graphic drivers. This was not unusual as I've had to reinstall my graphic's drivers before after a kernel update.  When I followed my usual steps, it didn't work.  I tried uninstalling the drivers, purging them and even tried to reinstall the generic stock graphic drivers.  In the end I just trashed my system to the point where it wouldn't boot.

By "Forced an Update" I mean updating my Linux Kernel with the following command;
(I recommend against doing this if you're using priority Nvidia Drivers unless they are up-to-date)

sudo apt install --install-recommends linux-generic-hwe-16.04 xserver-xorg-hwe-16.04

As I said that command crashed me, so be careful.  After I did a total reinstall using the 16.04.3 ISO with the 4.10 kernel it worked just fine with priority Nvidia driver.  I noticed I was using and trying to reinstall the NVIDIA-Linux-x86_64-361.45.11 version of the driver when it crashed me.  After the clean install and using the Ubuntu Priority Video Driver Install it worked but the the driver version was NVIDIA-Linux-x86_64-375.66 so maybe if I used the newer driver I wouldn't have trashed my system. (Note the newest is NVIDIA-Linux-x86_64-384.59 but I was scared to try it :-)  )

The data in the Home directory was still readable and I had a newer/bigger SSD laying around so I decided to just start fresh with a clean install.  The reinstall went well and I recovered all the data including my Virtualbox VM's.  The only problem I had was with Photoshop CS2 under wine 2.01.  It wasn't WINE's fault it was mine.  I eventually fixed it and I'll do another post on what went wrong, how to fix it, and how to avoid it.

Thursday, July 27, 2017

Ubuntu 16.04 (host) running Virtualbox 5.1.24 upgrading the guest to Windows 10 Creator Edition 1703

I'm running Ubuntu 16.04 with Virtualbox 5.1.24.  In Virtualbox I was Running Windows 10 Home 64bit (version 1607).  I wanted to upgrade it to Windows 10 Creator Edition (version 1703) which was released in April 2017.

I was a little worried about this update because there are multiple stories on the net about Creator Edition killing machine and that was when they were native Windows upgrades.  My virtual Windows 10 was not offering the upgrade so I decided to take a chance and downloaded the Stand Alone Updater for Windows 10 Creator Edition.

It took about 90 minutes total for it to download and install the update but it worked without problems.  After the resets my Virtualbox booted Windows 10 Creator Edition just fine.

The only problem I've noticed is that my network shares were not connecting.  I manually removed and reconnected them and they would work for a few minutes then started throwing errors about missing drives.

To work around this I setup SHARED FOLDERS in Virtualbox which worked.  When I clicked on NETWORK in Windows 10 it showed a server named VBOXSVR which had my SHARED FOLDERS (from my Ubuntu host) in it.  To connect it, I just mapped the drive in Windows 10 to reconnect at startup.  I used \\VBOXSRV\Downloads to connect my Ubuntu Downloads directory. That worked.  It now connects my Ubuntu Downloads directory as drive z: on my Windows 10 virtual.

To do this just;

1. Open Virtualbox
2. Right Click on your Windows 10 virtual
3. Select SETTINGS


4.  Select SHARED FOLDERS


5.  Click on the ADD FOLDER icon (blue folder with green plus)
6.  Browse to the (host) Ubuntu folder you want to access in your Virtual Win 10
7.  Select that folder and click OK.
8.  Start your Virtual Windows 10.
9.  Once booted click on your Windows 10 File Manager and click on NETWORK


10.  You should see a machine called VBOXSRV and your
       Virtual Win 10 Machine name.
11.  Double click on the VBOXSRV and you should see your
       Folder that you shared in Virtualbox during (Steps 5-7).
12.  Note that Folder Name
13.  In Windows File Manager double click on THIS PC


14.  Click on the MAP NETWORK DRIVE in the toolbar
15.  In the FOLDER block type \\VBOXSRV\FolderName
       (Replace FolderName with your Folder Name from Step 12)
16.  Check the RECONNECT AT SIGN-IN tick.


That's it you're done.  This is just a work around.  I tried to directly map the network drive in my virtual Win 10 to my Actual Ubuntu Share but that kept failing after a minutes of use.  Turning on the SHARED FOLDERS in Virtualbox and Substitute VBOXSRV for the name of my Ubuntu Computer name worked.


Tuesday, July 25, 2017

Make Iphone 7 ios 10.3.3 work on Ubuntu 16.04 (UPDATED now with bash scripts and desktop shortcuts)

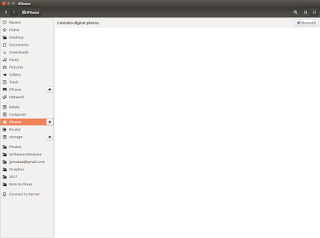
My Iphone 7 ios version 10.3.3 would not show me my photos or videos when I plugged it into my Ubuntu 16.04 box.  And I couldn't transfer anything on or off the phone.  This was really annoying and I wanted it fixed.  So I started Googling for answers and found very few.  

The picture to the right is what showed up in Nautilus when I plugged in the Iphone and hit the TRUST button on the phone.

Yep that's right, nothing showed up.  But we won't leave it at that, let's get access to our photos again.

Before we start, I want you to know that you should read through these instruction before you just start copying and pasting.  You will be using the MAKE command a few time and need to pay attention to what you're doing.  There are 21 steps, many with 5 or 6 substeps, that you will have to complete, and most are done in a Terminal Window (CLI).  This is NOT a simple copy and paste howto.  


MAKE SURE YOUR IPHONE IS NOT PLUGGED INTO YOUR COMPUTER


1. Open a Terminal Window and type:

     sudo apt-get install ideviceinstaller python-imobiledevice libimobiledevice-utils python-plist usbmuxd
     (Hit Enter)

                    If your Iphone iOS version is 8 or back, then skip steps 2 thru 17 
                    and type the following then continue with step 18. If your iOS 9 +
                   then skip this and goto Step 2 and complete all steps:

                           sudo apt-get install libimobiledevice6 libplist3 ifuse
                           (Hit Enter)

2.  In the Terminal Window type:

     sudo apt-get install libtool autoconf automake
      (Hit Enter)

3.  Type the following in your Terminal Window:

    sudo apt-get install libxml2-dev python-dev
    (Hit Enter)

4.  Download the latest version of libplist from Here.

5.  Extract the file you just downloaded (libplist-master.zip)
      A.  Open Nautilus and browse to the directory where the file libplist-master.zip was placed.
            Mine was put in my Downloads directory.


      B.  Right Click on the  libplist-master.zip file and select EXTRACT HERE from the right click
            menu.

            This will extract the files and create a directory called  libplist-master.

      C.  Browse to this newly created directory in your Terminal Window.
            Mine was located here:

            cd $HOME/Downloads/libplist-master
             (Hit Enter)

      D. Once in the libplist-master Type the following in your Terminal Window:

           ./autogen.sh
            (Hit Enter)

       E.  When Step D finishes Type the following in your Terminal Window:

             make
             (Hit Enter)

       F.  Type the following in your Terminal Window:

            sudo make install
             (Hit Enter)

6.  Download the latest version of libusbmuxd from here 

7.  Extract the file you just downloaded (libusbmuxd-master.zip)
      A.  Open Nautilus and browse to the directory where the file libusbmuxd-master.zip was placed.
            Mine was put in my Downloads directory.


      B.  Right Click on the libusbmuxd-master.zip file and select EXTRACT HERE from the right click menu.

            This will extract the files and create a directory called  libusbmuxd-master.

      C.  Browse to this newly created directory in your Terminal Window.
            Mine was located here:

            cd $HOME/Downloads/libusbmuxd-master
             (Hit Enter)

      D. Once in the libusbmuxd-master Type the following in your Terminal Window:

           ./autogen.sh
            (Hit Enter)

       E.  When Step D finishes Type the following in your Terminal Window:

             make
             (Hit Enter)

       F.  Type the following in your Terminal Window:

            sudo make install
             (Hit Enter)


8.  Install the build dependencies by Typing the following in a Terminal WIndow:

sudo apt-get install libssl-dev

9.  Download the latest version of libimobiledevice from here 

10.  Extract the file you just downloaded (libimobiledevice-master.zip)
      A.  Open Nautilus and browse to the directory where the file libimobiledevice-master.zip was placed.
            Mine was put in my Downloads directory.


       B.  Right Click on the libimobiledevice-master.zip file and select EXTRACT HERE from the right click menu.

            This will extract the files and create a directory called  libimobiledevice-master.

      C.  Browse to this newly created directory in your Terminal Window.
            Mine was located here:

            cd $HOME/Downloads/libimobiledevice-master
             (Hit Enter)

      D. Once in the libimobiledevice-master Type the following in your Terminal Window:

           ./autogen.sh
            (Hit Enter)

       E.  When Step D finishes Type the following in your Terminal Window:

             make
             (Hit Enter)

       F.  Type the following in your Terminal Window:

            sudo make install
             (Hit Enter)

11. Install usbmuxd by first, uninstall the old, then installing the new version of usbmuxd.  Type the following into a Terminal Window:

     sudo apt-get remove usbmuxd
     (Hit Enter)

      sudo apt-get install libimobiledevice-dev libplist-dev libusb-dev libusb-1.0.0-dev libtool-bin libtool
     (Hit Enter)

12.  Download the latest version of usbmuxd

13.  Extract the file you just downloaded (usbmuxd-master.zip)
      A.  Open Nautilus and browse to the directory where the file usbmuxd-master.zip was placed.
            Mine was put in my Downloads directory.


       B.  Right Click on the usbmuxd-master.zip file and select EXTRACT HERE from the right click menu.

            This will extract the files and create a directory called  usbmuxd-master.

      C.  Browse to this newly created directory in your Terminal Window.
            Mine was located here:

            cd $HOME/Downloads/usbmuxd-master
             (Hit Enter)

      D. Once in the usbmuxd-master Type the following in your Terminal Window:

           ./autogen.sh
            (Hit Enter)

       E.  When Step D finishes Type the following in your Terminal Window:

             make
             (Hit Enter)

       F.  Type the following in your Terminal Window:

            sudo make install
             (Hit Enter)


14.  Install ifuse
     
        sudo apt-get install libfuse-dev

15.  Download the latest version of ifuse from here

16.  Extract the file you just downloaded (ifuse-master.zip)
      A.  Open Nautilus and browse to the directory where the file ifuse-master.zip was placed.
            Mine was put in my Downloads directory.


       B.  Right Click on the ifuse-master.zip file and select EXTRACT HERE from the right click menu.

            This will extract the files and create a directory called  ifuse-master.

      C.  Browse to this newly created directory in your Terminal Window.
            Mine was located here:

            cd $HOME/Downloads/ifuse-master
             (Hit Enter)

      D. Once in the ifuse-master Type the following in your Terminal Window:

           ./autogen.sh
            (Hit Enter)

      E.  Type the following in your Terminal Window:
   
            ./configure
            (Hit Enter)

      E.  When Step D finishes Type the following in your Terminal Window:

             make
            (Hit Enter)

       F.  Type the following in your Terminal Window:

            sudo make install
             (Hit Enter)

17.  Type the following in your Terminal Window:

       usbmuxd
       (Hit Enter)

18. PLUG IN YOUR IPHONE NOW

19.  Type the following in your Terminal Window:

        dmesg | grep ipheth
        (Hit Enter)
   

        You should see some info in your Terminal Window.  If not unplug your iphone and try to run these commands again.  You may have hit the TRUST popup on your Iphone too.

                      usbmuxd
                      (Hit Enter)

                      dmesg | grep ipheth
                      (Hit Enter)


20.  Creating a mount point by typing the following into your Terminal Window:

        sudo mkdir /media/iPhone
         (Hit Enter)

        sudo chmod 777 /media/iPhone
         (Hit Enter)


21. Edit your ifuse configuration file by typing the following into your Terminal Window

      sudo gedit /etc/fuse.conf

Once the fuse.conf file opens in gedit, add the following two lines directly under the line that reads

 # Allow non-root users to specify the allow_other or allow_root mount options:

Add these two line under the #Allow non-root...

op$
user_allow_other

When done these should be your last three lines:

 # Allow non-root users to specify the allow_other or allow_root mount options:
op$
user_allow_other

Save the fuse.conf file and exit out of the editor.


The work part it done.  Now we can Pair our Iphone so that we can once again transfer pictures and other files to and from our Iphone on Ubuntu 16.04.


Pairing the iPhone

1.  Type the following into your Terminal Window;

       idevicepair pair
        (Hit Enter)

2.  Mount your Iphone by typing the following into your Terminal Window;

     ifuse /media/iPhone
      (Hit Enter)

You can now get to your files on your Iphone through the Nautilus File Browser.  You should see an Iphone directory link on the left side panel in Nautilus.


Unpairing the Iphone

1.  Now to Unmount/Unpair your Iphone, Open a Terminal Window and type the following

    fusermount -u /media/iPhone/
    (Hit Enter)

    idevicepair unpair
    (Hit Enter)


That's it, we're done, easy wasn't it :-)


NOTES:  You have to do the Pairing and Unpairing steps every time you connect your Iphone (Last 4 steps on this page).  I know that's a pain is the ass but hey you got access at least.  I wrote two BASH scripts (connect and disconnect) and make desktop shortcuts for those BASH scripts.  Now I plug my Iphone into my Ubuntu 16.04 box, Click on the CONNECT shortcut (minding the TRUST button) and I'm good to go.  When I'm done I just click on the DISCONNECT shortcut and unplug the Iphone.  This howto was put together from several Google searches but most of it was from here.  To encourage you to read his article too, he tells you what to do if you've rooted your iphone so you can get full file system access.


UPDATE: HERE ARE THE BASH SCRIPTs

I've had several requests for the connect / disconnect BASH scripts so here they are:

CONNECT SCRIPT.
Open a text editor and type the following into a blank file.

#!/bin/bash  
idevicepair pair
ifuse /media/iPhone 
echo "Iphone Connected"

Now save this file to your HOME directory as connect.sh


DISCONNECT SCRIPT
Open a text editor and type the following into a blank file.

#!/bin/bash  
fusermount -u /media/iPhone/
idevicepair unpair
echo "Iphone Disconnected"

Now save this file to your HOME directory as disconnect.sh


To execute the connect command bash script you run the follow command in Terminal;
bash connect.sh

To execute the disconnect command bash script you run the follow command in Terminal;
bash disconnect.sh


But most you will want to make desktop shortcuts to these commands so that you can just click on a "connect" icon on your desktop and when done click on a "disconnect" icon.  

Here's how to get Desktop Shortcuts

1.  Open a Terminal Windows and run the following commands (RED)
      sudo apt update
          (HIT ENTER)

      sudo apt install gnome-panel
          (HIT ENTER)
      gnome-desktop-item-edit --create-new ~/Desktop
             (HIT ENTER)

One you run that last command the following window should popup (with blank data in the fields)
You need to make the following changes for the CONNECT command;

TYPE: Application in Terminal
NAME: Connect Iphone  (or whatever you want your shortcut called)
COMMAND: bash connect.sh
COMMENT: (What ever you want to say about this shortcut or just leave it blank)
Once the changes are made click OK.

NOTE: you can click on the terminal icon (upper left black square with  ">:_" in it)  This will let you browse your computer and pick an icon or graphic of your choice.  This is the icon that will show up on your desktop.

The parts in RED must be typed exactly as I have them here.


Open a Terminal windows an re-run:
gnome-desktop-item-edit --create-new ~/Desktop
             (HIT ENTER)

You need to make the following changes for the DISCONNECT command;

TYPE: Application in Terminal
NAME: Connect Iphone  (or whatever you want your shortcut called)
COMMAND: bash disconnect.sh
COMMENT: (What ever you want to say about this shortcut or just leave it blank)
Once the changes are made click OK.

The parts in RED must be typed exactly as I have them here.

NOTE: you can click on the terminal icon (upper left black square with  ">:_" in it)  This will let you browse your computer and pick an icon or graphic of your choice.  This is the icon that will show up on your desktop.