I wanted a Laser Printer that would worked with Ubuntu and Windows 10. After a little research I settled on the Brothers HL-L2300D Laser Printer which I got for $89 on Amazon.
I used the included installation CD for my Microsoft Windows 10 machines (both VirtualBox and Laptop). It was a typical Windows install and went without problems.
On my Ubuntu 16.04 box, after a few Google searches, I found the drivers and instruction on Brothers Support Site. When you get to the site you have to select the Linux and Linux (deb) options then click on the SEARCH button.
Once you hit the SEARCH Button you will be taken to the DOWNLOADS Page. Select the DRIVER INSTALL TOOL.
On the next page click on the AGREE TO EULA AND DOWNLOAD which will download the file linux-brprinter-installer-2.2.0-1.gz to your Downloads directory and display a page with install Instructions. Just follow those instructions and you'll be good to go. I'll paste those instruction as I used them to install the drivers for the Brothers HL-L2300D Printer.
-----------------------------------------------------------
Step 1. Download the tool.(linux-brprinter-installer-2.2.0-1.gz)
The tool will be downloaded into the default "Downloads" directory.
(The directory location varies depending on your Linux distribution.)
e.g. /home/(LoginName)/Downloads
Step 2. Open a terminal window.
Step 3. Go to the directory you downloaded the file to in the last step. By using the cd command.
cd Downloads
Step 4. Enter this command to extract the downloaded file:
gunzip linux-brprinter-installer-2.2.0-1.gz
Step 5. Get superuser authorization with the "su" command or "sudo su" command.
sudo su
Step 6. Run the tool:
bash linux-brprinter-installer-2.2.0-1 HL-L2300D
Step 7. The driver installation will start. Follow the installation screen directions.
When you see the message "Will you specify the DeviceURI ?",
For USB Users: Choose N(No)
For Network Users: Choose Y(Yes) and DeviceURI number.
NOTE: My printer is hooked up to my network via an I/O GEAR USB to NETWORK printer share device and not plugged directly into my computer via USB, so I choose Y(yes) and when asked for my DeviceURI, I entered socket://192.168.1.90:9100 which is the IP Address/port of my printer share device.
You can also just select N(no) and after the Terminal Program is done, go into SYSTEM SETTING then PRINTERS then Right Click on your newly installed printer and select Properties and make your network changes there.
-------------------------------------------------------------------------------
I hope this helps as I had trouble finding a printer that worked with Ubuntu 16.04. From looking at Brothers Support Site it appears that they have Linux drivers for several of their modern Inkjets, laser (color or B/W) and Scanner/Fax/Printers machines.
A devoted MS Windows user gives up all his Windows machines to explore Ubuntu 6.1 Linux for 30 days. If I can't figure out how to do it with Linux I just won't do it. (This was from Nov 1 to Dec 1, 2006, I have continued to use Ubuntu beyond those 30 days and now will try to post how-to's, help, and other Linux (Ubuntu) thoughts here)
Wednesday, June 06, 2018
Saturday, May 12, 2018
Virtualbox 5.2.12 - Host Ubuntu 16.04 with a Guest Ubuntu 18.04 - Getting Guest Additions working after update.
I wanted to experiment with Ubuntu 18.04 before I committed to it on my production machine so I installed it on a virtual machine using Virtualbox. My HOST system is Ubuntu 16.04 and the Ubuntu 18.04 is the GUEST. Everything was going fine until Virtualbox upgraded to 5.2.12.
Usually when Virtualbox upgrades it prompts you to upgrade your GUEST ADDITIONS which gives you better screen resolutions, shared clipboards, seamless mode and other very useful stuff. My Windows 10 GUEST did just this and worked just fine, however the Ubuntu 18.04 GUEST would not Mount the Guest Additions ISO.
The solution I found was to install the Guest Additions via the Terminal (Command Line) in the Guest Ubuntu 18.04. Once again RUN THESE TERMINAL COMMAND IN YOUR GUEST UBUNTU 18.04 not you host Ubuntu 16.04.
sudo apt-get update
sudo apt-get install virtualbox-guest-dkms
After running these two commands on the GUEST 18.04 just restart the GUEST and you should be good to go.
If this does not work for you, here are some more suggestions.
After running these two commands on the GUEST 18.04 just restart the GUEST and you should be good to go.
If this does not work for you, here are some more suggestions.
Wednesday, February 14, 2018
DarkTable Tethering - Nikon D7200 - Error 53
I was trying to connect my Nikon D7200 DSLR camera to my Ubuntu 16.04 box and tether it to DarkTable so that I could control the camera with/from the computer. When I plugged my camera into the USB port, Ubuntu didn't recognized it but mounted the camera's two memory cards as removable hard drive. I could access the memory cards with Nautilus and move files to and from the cards just fine. However when I launched DarkTable I got the error "Error initializing camera: -53: Could not claim the USB device". To fix this all I had to do was open Nautilus, right click on the two memory cards and select "Unmount". After Unmounting the two memory cards I launch DarkTable, selected the Tethering Tab and it worked flawlessly. I'll have to unmount the memory cards every time I plug the camera in but it's not that hard and it works

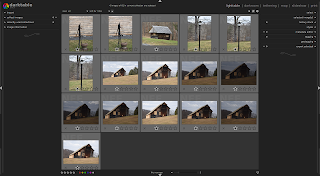
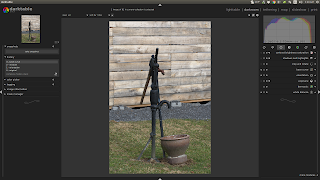
For those of you who don't know, DarkTable is photo post processing software. It competes with Adobe Lightroom and I think you can do more with it than Lightroom. If you capture your photos with your DSLR camera in the RAW format you adjust the colors, exposures, saturation, and much, much more. You can still adjust JPG photos too but not as much or as nice as you can with the RAW format. Trust me, if you've spent the money on a good DSLR camera, capture your photos in RAW. DarkTable allows you to export your RAW format files (DNG, NIK, CRW, CR2) to JPG's after you've adjusted them.

The RAW format of your DSLR captures and stores much more information than JPG. So even if you do nothing with RAW images other than convert a copy of it to JPG keep/shoot in the RAW format so that you'll have captured the data to use later when you learn how to use a program like DarkTable.

For those of you who don't know, DarkTable is photo post processing software. It competes with Adobe Lightroom and I think you can do more with it than Lightroom. If you capture your photos with your DSLR camera in the RAW format you adjust the colors, exposures, saturation, and much, much more. You can still adjust JPG photos too but not as much or as nice as you can with the RAW format. Trust me, if you've spent the money on a good DSLR camera, capture your photos in RAW. DarkTable allows you to export your RAW format files (DNG, NIK, CRW, CR2) to JPG's after you've adjusted them.

The RAW format of your DSLR captures and stores much more information than JPG. So even if you do nothing with RAW images other than convert a copy of it to JPG keep/shoot in the RAW format so that you'll have captured the data to use later when you learn how to use a program like DarkTable.
A Bonus Tip: If you use Photoshop CS6 (the last own it non-cloud version) you can install Adobe's Camera Raw Plug-in and get a lot of Lightroom ($10 monthly) / DarkTable (Free) function to use with your RAW images inside Photoshop CS6. The CS6 version is 9.11 (near the bottom of the page).
Subscribe to:
Comments (Atom)


